• You are viewing the forum as a Guest, please login (you can use your Facebook, Twitter, Google or Microsoft account to login) or register using this link: Log in or Sign Up

Cheap pressurised CO2 system DIY guide

Anyone set this system up recently?
Most of the links are defunct now as they are a few years old, so was interested to see if anyone had some updated sources or fixings?
I found the Draper Regulator Here for a really good price, but someone may have an updated version??

Let me know if you have a shopping list left over?

Cheers!
Simon

would you really want a regulator that goes out to 1,900 psi!😳

id be seriously Reconsider, especially if new to co2.
 
Hence why I was asking if anyone had live links for the products originally posted.
To me, that regulator looked the same as the one at the start of the topic? Thank you for pointing it out if its different!
I will wait around a while to see if anyone has assembled this recently. You have highlighted how misleading a picture can be, although I also presumed that a needle valve controlled the output? I do know sod all about this though😳.
Thanks for highlighting!
Simon
 
First the obligatory safety warning (sorry), this tutorial uses a cylinder pressurised to around 50psi or 3.5 bar. Gas under pressure can be dangerous if not treated with respect. If something goes wrong that’s your fault, not mine. I accept NO responsibility for loss, damage or injury incurred if you use this guide. But be sensible and you shouldn’t have too many problems 🙂

Right, some of you will have seen my pressurised CO2 tutorial based on a fire extinguisher Fire extinguisher CO2. Well having upped the lighting over my work tank I wanted to add some pressurised CO2, after having realised that yeast CO2 is woefully inadequate and too messy even for my 60lt tank.

I set myself the task of seeing just how cheaply I could put together a pressurised CO2 system and so I’ve come up with the below. Its not perfect and has some quite large ‘cons’ but that should hopefully be balanced by some equally large ‘pros’ and give people on a relatively tight budget the opportunity to try pressurised CO2. I dare say few would go back to yeast 🙂 I also wanted to provide a kit that anyone could get, so all the parts I’ve used I purchased online.

Right first off, the cylinder. This system is based on the disposable 600g CO2 cylinders used for welding. A very cheap place is machine mart, but I dare say you might be able to find cheaper.

View attachment 68096

The cylinder is sold with a green cap over the tread, which once removed shows the 1/8 BSPT (British Standard Pipe Thread) thread.

View attachment 68097

As this is a cheap system I opted for the cheapest regulator I could find, with is a welding regulator with no gauges.

Disposable Draper regulator

View attachment 68098

This regulator is supplied with a 4mm OD (outside diameter) push fit connector, which you have to unscrew.

View attachment 68099

View attachment 68100

View attachment 68101

The tricky part of this system was finding a way of converting the 4mm OD push fit adaptor on the regulator to receive 6mm OD CO2 tubing. Then I started to look for pneumatic adaptors and found this one, a 6mm Push in M Stud connector 1/8 BSPT. The ‘1/8 BSPT’ part is the important bit as it determines is the size of the thread 😉 with the ‘6mm’ part the size of the ‘push fit’ connector.

View attachment 68102

View attachment 68103

I got it from Simply Pneumatics.

This you then have to screw onto the regulator and tighten using the wrench. As you can probably see it is supplied with a plastic coating on the thread. This was also on the connector I removed and I assume ensures an airtight seal that can withstand the pressure.

View attachment 68104

View attachment 68105

View attachment 68106

Then screw the adapted regulator onto the cylinder.

View attachment 68107

View attachment 68108

Then ‘push’ one end of the CO2 tubing into the 6mm connector you just added to the regulator. This process required a reassuring bit of pressure and I could feel that it was a good fit. It is after all a pneumatic connector so should cope quite happily with the pressure, one of the advantages of using the connector I have.

View attachment 68109

The next hurdle was to incorporate some kind of needle valve to allow the CO2 rate to be controlled. As most will have realised the regulator doesn’t have a needle value built in.

Fortunately our very own AquaticMagic can supply this.

View attachment 68110

Unscrew both the tubing fixings and add the CO2 tubing, which can be purchased from lots of places but AquaticMagic do that also.

View attachment 68111

View attachment 68112

View attachment 68113

View attachment 68114

And the same on the other one.

View attachment 68115

Then all that is left is to add the diffuser, its up to you which you chose, but I like the nano glass diffusers, which I’ve even used on my 250lt tank, so to my mind there is no reason to get anything bigger. I’m also a fan of the cheapo inline diffusers.

Here is the complete system. I dunked the whole thing into my 4ft tank with the regulator fully open and am pleased to say not a single leak 🙂 obviously you could reduce the length of the CO2 tubing to fit as necessary, I just used what I had laying around.

View attachment 68116

Right to costs, all the below costs include postage where applicable.

600g CO2 cylinder - Machine Mart - £15.41 (£4.50 of this is postage, obvious cost savings if you order several cylinders at once or are able to visit a shop if there is one near you.)

Regulator for disposable cylinders - eBay - £19.99

6mm Push in M Stud connector 1/8 BSPT - eBay - £1.80

Needle value - eBay - $13.40 USD (equaled £8.34 GBP at time of buying)

CO2 tubing - eBay - £2.92

Diffuser - eBay - £4.97 (for two! And two suction cups!)

Total = £53.43

Right pros and cons

Pros = Cheap 😉 available to everyone who can buy stuff online (ok an obvious point but I think an important one), easy to set up (would take less than 5 minutes once you get all the parts), easily adaptable to add extra parts such as a solenoid or even an adaptor that allows you to use refillable cylinders and/or fire extinguishers.

Cons = main one is that is doesn’t have any gauges, so you’ll not know when the CO2 is about to run out, but as this was really an exercise in being a cheapskate I went for the gaugeless regulator. I will just make a note of when the cylider runs out and put a memo in my phone to remind me to replace it before the next one runs out. There are regulators for disposable cylinders that have either one or two gauges but these cost a fair bit more. 600g cylinders will also limit the size of tank you could reasonably use it on. Currently this is on my 60lt tank but I reckon could be used on tanks up to 100lt without using the CO2 at a stupid rate, which hopefully makes it suitable for most tanks.

As a final word, I happened to have laying around a busted lunapet regulator, which Andy (Supercoley) said the needle value could be unscrewed and used in place of the 1/8 6mm adaptor above.

This has the added advantage of having a needle value built in. You can buy these separately, but I could only source these from Germany and the postage cost made this option just too costly. But if you want an ‘all-in-one’ solution its worth remembering, a bit of searching and you might find it cheaper.

EDIT - this has been suggested as a replacement for the push fit connector and as it has a needle value built it removes the need for the co2 hosting between the reg and needle value. I've not tried it but it would make the whole system a lot simpler.

http://www.hosefit.co.uk/catalog/produc ... cts_id=778

I hope this is of help to some people.

Sam

EDIT - 2/2/2011

Following some recent threads I've found that Lunapet post a needle value to the UK for just 2 euro's. So you can have the co2 tubing connector and needle value built into the same attachment and for aorund £10. This is the one I've mentioned later on in the this thread and I've used in my system 🙂

http://cgi.ebay.co.uk/Feinnadelventil-N ... 20addf0baf
Question I setup my first DIY co2 system the fzone 4l off Amazon I followed all the instructions and it was working I have it on a timer to go off in the evening and to come bk on 1.5hrs before my lights now after reading a few different things from Google please don't shoot me for listening to Google but it says to remove my air stone so I did but I woke up with a dead fish and a few near the surface,my question is should I leave the air stone out or leave it on in the evening until I get the co2 levels right I'm worried that there's no surface agitation from the air stone during the evening, sorry in advance for the long reply
 
Hi all,
Welcome to UKAPS, and sorry for your losses.
now after reading a few different things from Google please don't shoot me for listening to Google but it says to remove my air stone so I did but I woke up with a dead fish and a few near the surface,my question is should I leave the air stone out or leave it on in the evening until I get the co2 levels right
That is a real problem, there is "advice", often contradictory, coming in every direction. Hopefully we can give you better advice than Google.

I'm not a CO2 user personally, but "yes" leave the air stone in and on. As you've found dissolved oxygen levels are different from everything else, and even a short period of <"low dissolved oxygen / high dissolved CO2"> kills your livestock.

Can we have a picture of the tank? It will give us a bit more idea.

cheers Darrel
 
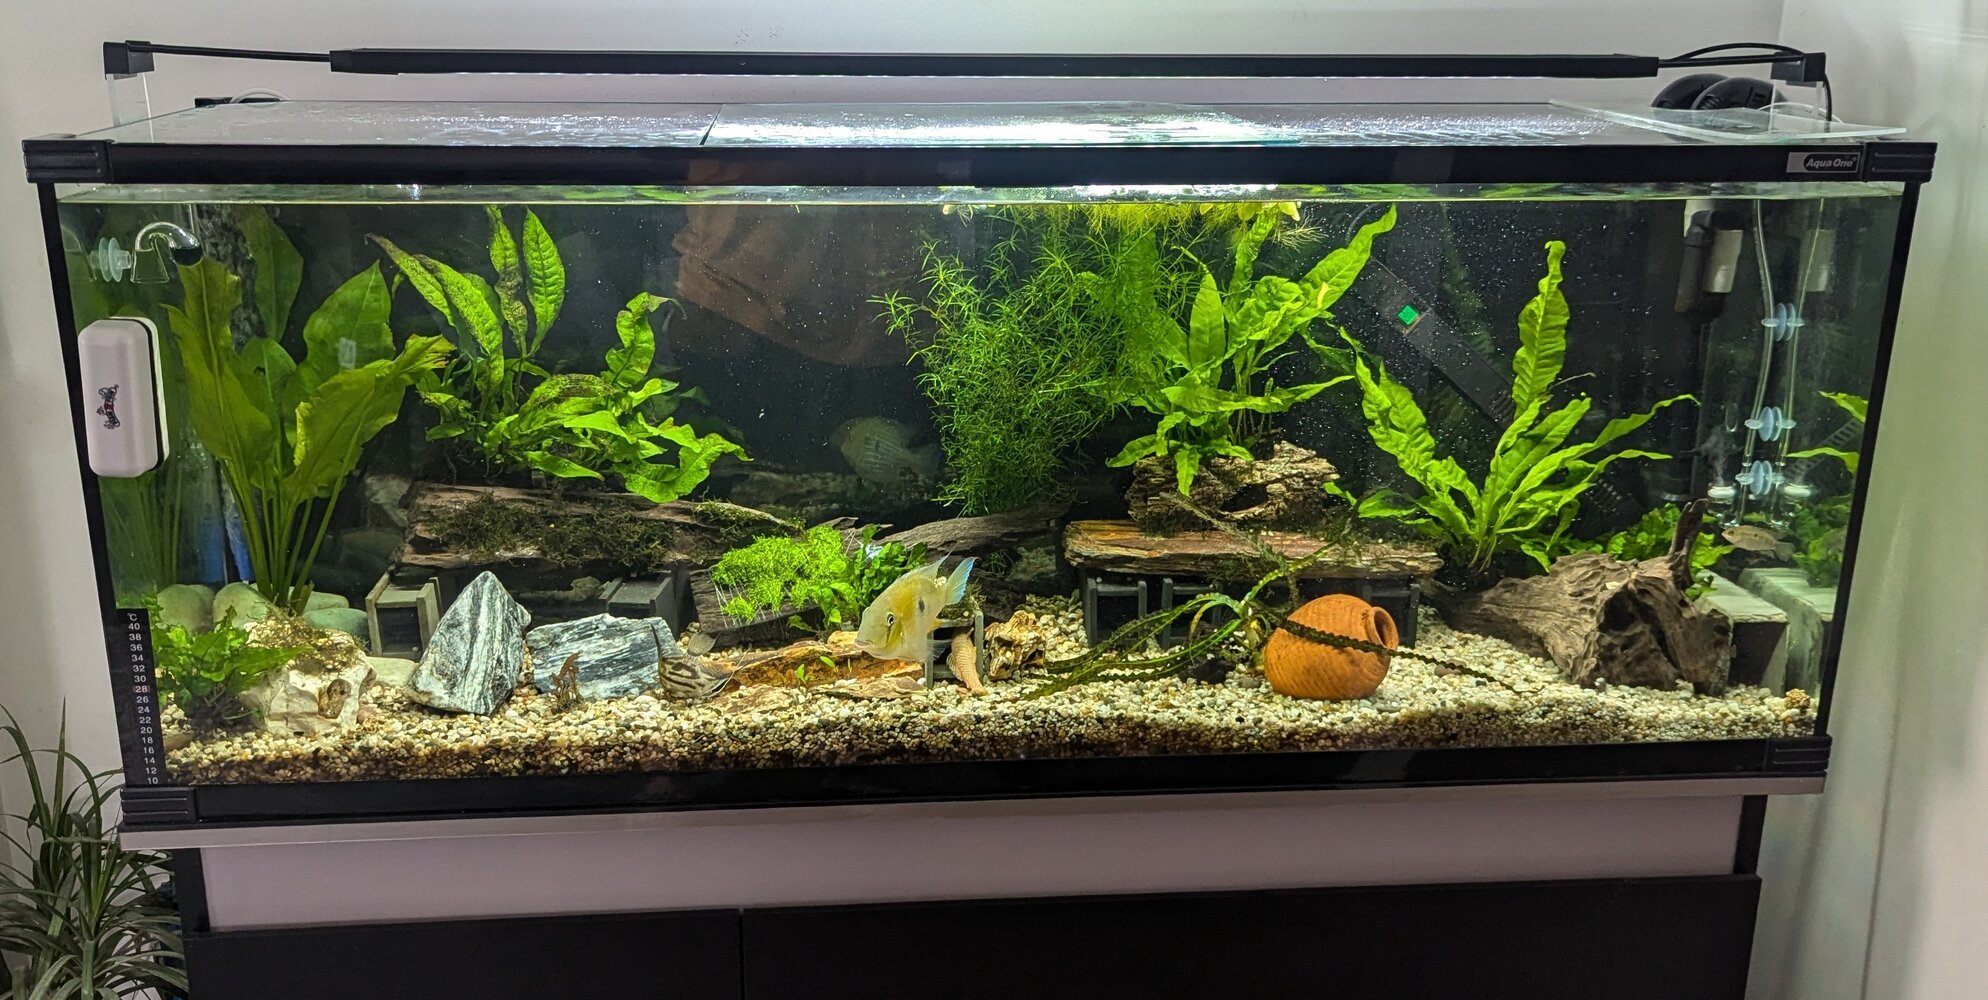
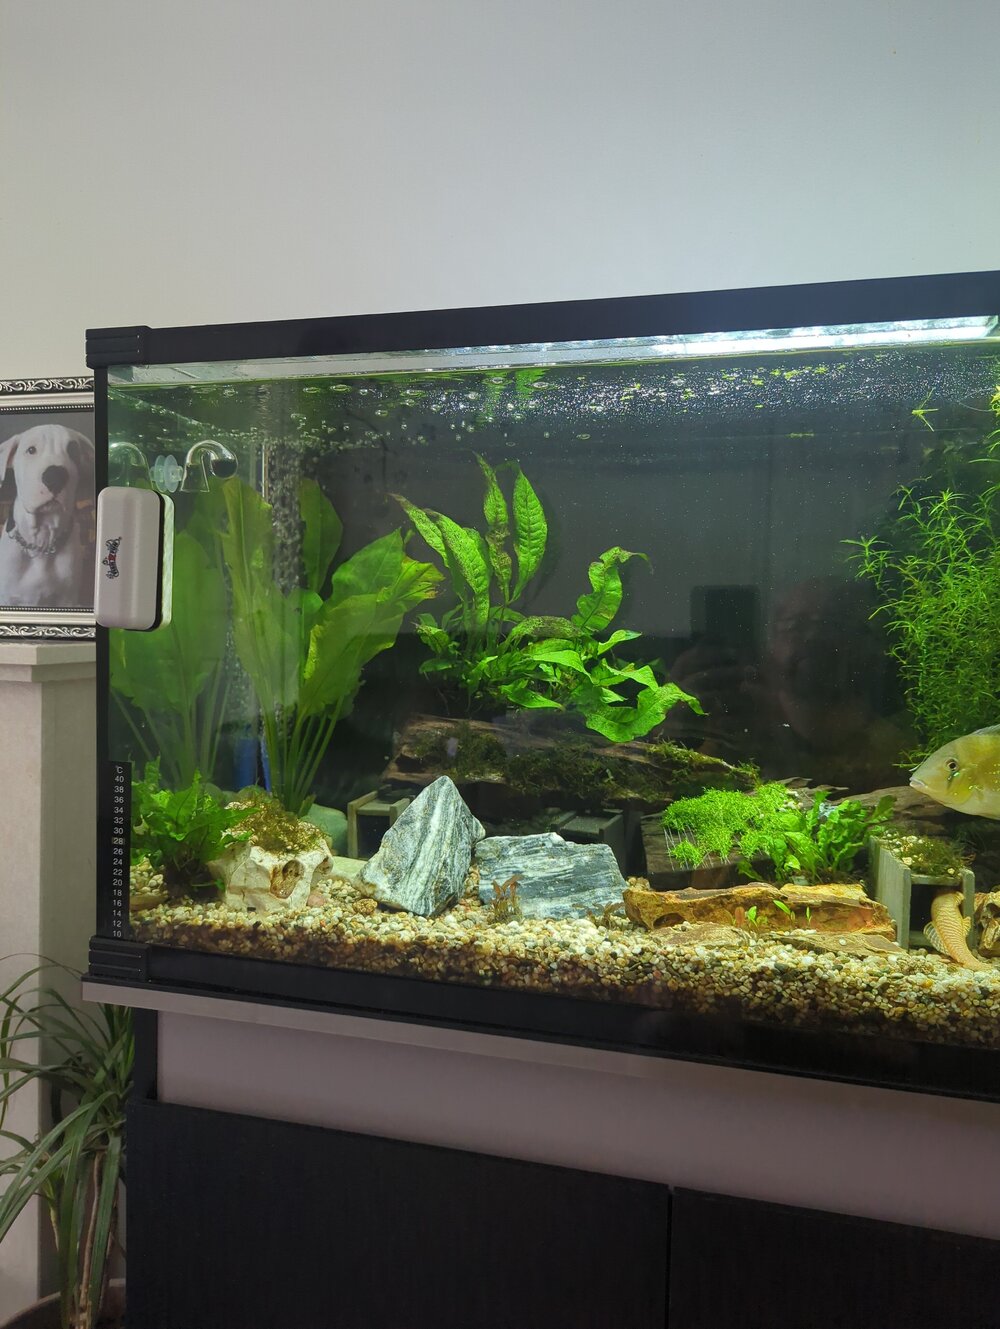
This is my 182l tank I run a fluval 407
 

Attachments

  • PXL_20240627_125327247.MP.jpg
    PXL_20240627_125327247.MP.jpg
    3.9 MB · Views: 72
Hi all,
This is my 182l tank I run a fluval 407
Yes, that looks fine. I can see the caves, do you have L numbers? and are they the fish that died?

You don't actually need CO2 with the plants you have.

I can see your floaters and I'm a <"floating plant obsessive">, but one advantage of floating (or emergent) plants is that they have access to <"atmospheric gases">.

cheers Darrel
 
I had 1 dead fish now it could be coincidental I'm not sure, the reason I wanted to go down the co2 route is id like to be able to successfully have a more densely planted tank,I've recently added java moss and Riccia fluitan (because I'd like a carpet effect)and the guppy grass and I've tried to add other types of grass with no success, I'm disabled so I'm home nearly all the time and I'm trying to put everything into but I've not been overly successful with plants and having to replace them quite often I used liquid fertilisers (easy life) pro-fit, ferro and potassium on different days
 
Hi all,
used liquid fertilisers (easy life) pro-fit, ferro and potassium on different days
and I've tried to add other types of grass with no success,
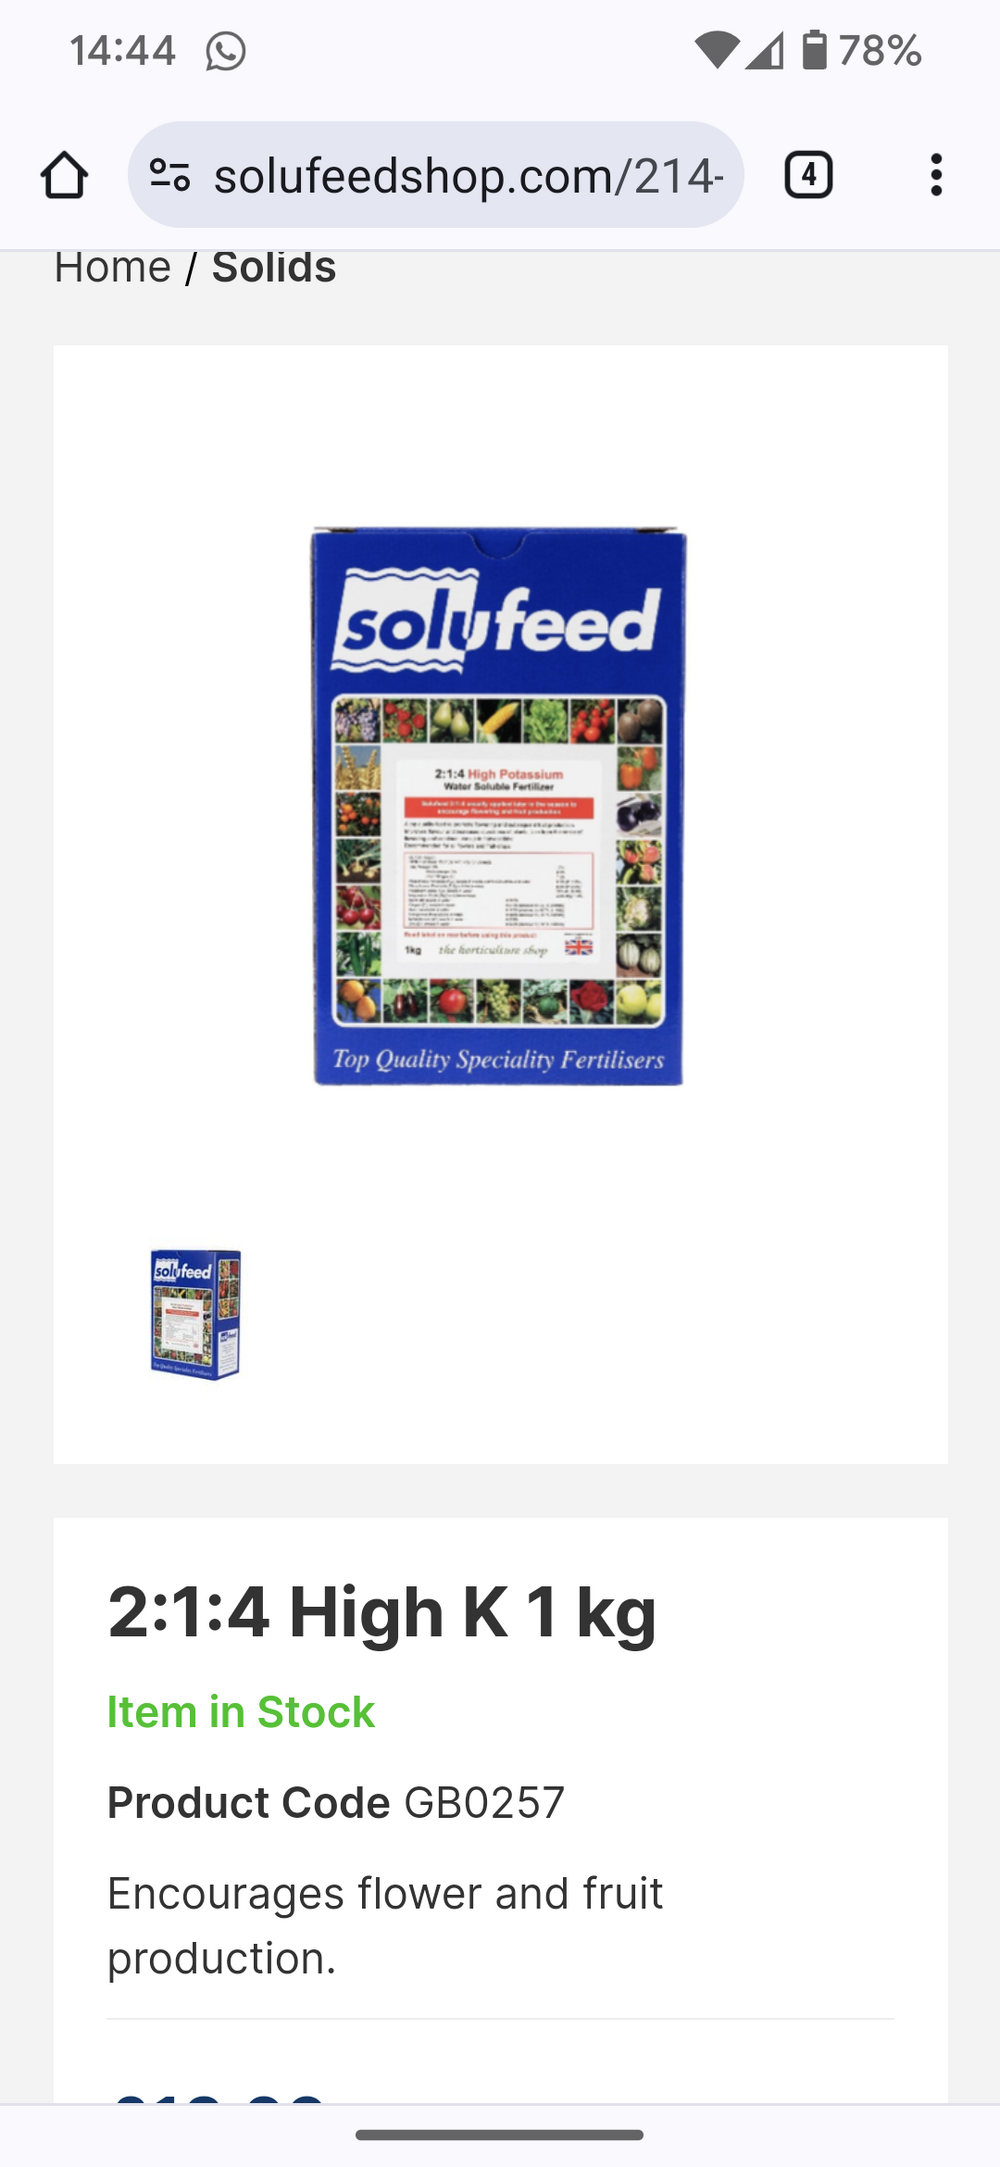
I'm guessing that is where your problems lie, you need a fertiliser that supplies all the nutrients required for plant growth. Have a look at <"Solufeed 2:1:4 and Solufeed Sodium Free TEC or Solufeed Coir TEC Combination">.
Riccia fluitan (because I'd like a carpet effect)
I think you will struggle with Riccia fluitans, it really wants to be at the <"water's surface">. Not really the same effect, but Susswassertang (<"Lomariopsis lineata">) is a lot lower maintenance.

cheers Darrel
 
Thanks Darrell I appreciate your input I'll check them things you suggested out 👍🏻
 
Pause CO2 until you actually have more plants and plants that will benefit from it. Currently it is an unnecessary expense and thing to cause issues.

Agree that inadequate ferts is the cause of your poor plant growth currently. Edit: notably, you currently are not dosing any nitrate.

What's going on with your drop checker. I think it is only blue in the picture but lights are on
 
Is this the stuff ? And I don't mean to be a pain how do you dose it? Do you pre-disolve before adding it to the tank
 

Attachments

  • Screenshot_20240627-143948.png
    Screenshot_20240627-143948.png
    1.1 MB · Views: 49
my question is should I leave the air stone out or leave it on in the evening until I get the co2 levels right I'm worried that there's no surface agitation from the air stone during the evening, sorry in advance for the long reply
It was often suggested that to optimize CO2 you should reduce aeration and surface agitation. Of course this would make it easier to reach higher CO2 concentrations.

Nowadays the suggestion is the opposite. You need adequate flow throughout the tank to distribute CO2 and you need decent aeration for proper oxygenation and to work as a safety limit for dissolved CO2. Aeration is usually provided by filters and pumps creating surface agitation, but it can also come from air pumps. You compensate the higher CO2 losses with a higher CO2 injection rate. This way you can reach the desired CO2 concentrations with more safety and stability, at the cost of some CO2 waste.

The picture doesn't show the water surface of your tank, but it does look agitated... If that's the case, my guess is that the airstone wouldn't have changed much. In any case, I recommend starting your CO2 adventures at a lower rate, especially since your plants aren't very demanding, and increase it while observing fish behavior, giving them time to adapt.
Sillily I removed the air stone last night and I have put it back in this morning, I'm currently running at approx 2bps and to get that I counted the amount of bubbles in a 10 second period with my son on the stop watch and then devided it by 10 for the bps
 

Attachments

  • 17194960556606185502269763925570.jpg
    17194960556606185502269763925570.jpg
    1.5 MB · Views: 53
Pause CO2 until you actually have more plants and plants that will benefit from it. Currently it is an unnecessary expense and thing to cause issues.

Agree that inadequate ferts is the cause of your poor plant growth currently. Edit: notably, you currently are not dosing any nitrate.

What's going on with your drop checker. I think it is only blue in the picture but lights are on
It was only setup yesterday so I'm trying to get the required co2 levels by slowly upping the bps the defuser is at the opposite side of the tank where do you suggest for the best placement, again I've been using Google for the answers and what I'm learning is that there's a ton of conflicting information and someone suggested this site hence the reason I'm trying to gather information from people who actually know what they are talking about
 
Hi,
I personally wouldn't turn up the CO2 any more at the moment (your current plants will be fine with lower levels), in fact I would turn it down a notch for the time being. I can see you have guppy grass in there but with a tank that size I'd be tempted to add a fair few more bunches of fast growing stems along the back (Hygrophila corymbosa 'Siamensis 53B' and Limnophila Sessiliflora for eg) especially with the use of CO2. Once planted out, set about increasing the CO2 level a notch each day until you reach the desired amount, so your checker is the colour you require after 2 hours of lights on, and it wants to stay the same throughout the photoperiod (a pH profile would be better). To be honest though I wouldn't bother striving for the high levels anyway, with that big fish in there, the plants you have and have been suggested and your light doesn't appear to be overly bright, just aim for middle ground, 15mg/l or so rather than teetering on the brink of disaster. 30mg/l, high light and EI are for the rapid growth junkies. Stability of your CO2 and tank parameters in general are some of the most important factors on the road to success.
I do/have done the same and my established tank has never looked better after three years but I'm sure others will offer different paths to follow.
Cheers!
 
Is this the stuff ? And I don't mean to be a pain how do you dose it? Do you pre-disolve before adding it to the tank
Yes. You need trace elements and macro nutrients so you need the 2:1:4 aswell.

That box of TEC will last you FOREVER. I use these products and you need such a tiny amount of the trace elements. It’s very good value.

I run pressurised CO2 at a level lower than most recommend. It’s just a boost which I have found works well although I don’t grow any very difficult plants. I also run an airstone 24/7.
 
where do you suggest for the best placement
Diffuser placement goes hand in hand with flow distribution. To maximize dissolution, you want to maximize the time the bubbles travel through the water before reaching the surface, and you want it to go through some turbulence, if possible. One common flow distribution technique is to have the filter output on one side of the tank, strong enough to push water all the way to the opposite glass, forcing the water to travel the entire surface and then move downwards when reaching the glass, and then to travel the entire length of the substrate, all the way to the filter inlet that is positioned next to the outlet. In this situation, the diffuser would best be placed on the opposite side to the filter outlet, in the region where the water moves downwards.

With the bubbles trying to move up and the water moving down, you increase contact time and turbulence. If the bubbles are small enough, at some point they will be dragged by the flow, traveling near the substrate through the entire length of the tank.

If your flow is set differently, or if it isn't strong enough to reach the opposite glass, you'll have to test where you can place the diffuser to maximize dissolution.
 
Hi,
I personally wouldn't turn up the CO2 any more at the moment (your current plants will be fine with lower levels), in fact I would turn it down a notch for the time being. I can see you have guppy grass in there but with a tank that size I'd be tempted to add a fair few more bunches of fast growing stems along the back (Hygrophila corymbosa 'Siamensis 53B' and Limnophila Sessiliflora for eg) especially with the use of CO2. Once planted out, set about increasing the CO2 level a notch each day until you reach the desired amount, so your checker is the colour you require after 2 hours of lights on, and it wants to stay the same throughout the photoperiod (a pH profile would be better). To be honest though I wouldn't bother striving for the high levels anyway, with that big fish in there, the plants you have and have been suggested and your light doesn't appear to be overly bright, just aim for middle ground, 15mg/l or so rather than teetering on the brink of disaster. 30mg/l, high light and EI are for the rapid growth junkies. Stability of your CO2 and tank parameters in general are some of the most important factors on the road to success.
I do/have done the same and my established tank has never looked better after three years but I'm sure others will offer different paths to follow.
Cheers!
Hi thanks for in put the light is the fluval 2.0 and it's set at about 70% and it can be increased I've had it at this level because of the plants I currently have, I've recently added some crypt and I cut them down to the white part just above the roots so I don't get any melting as it establishes itself , the guppy grass has had a growth spurt in just 3 days of the co2 , I like your idea of some stemmed plants, thanks for your input I'm off to my local fish shop called pier aquatics in Wigan, do recommend any on line stores for plants
 
Back
Top