What’s the device to the right of the Oase crystal skim?
-
You are viewing the forum as a Guest, please login (you can use your Facebook, Twitter, Google or Microsoft account to login) or register using this link: Log in or Sign Up
You are using an out of date browser. It may not display this or other websites correctly.
You should upgrade or use an alternative browser.
You should upgrade or use an alternative browser.
Astrobiology - Ancient Mars History - A Temporal Biotope
- Thread starter hydrophyte
- Start date
- Joined
- 22 Aug 2009
- Messages
- 1,092
What’s the device to the right of the Oase crystal skim?
That's just a DIY internal filter. It's adequate.
Valeriy Aqyar
Member
[UWSL]hydrophyte[/UWSL], you are doing something unbelievable here!
Being a teenager I was impressed by Ray Bradbury's novel "The Martian Chronicles''. I saw myself as a Mars researching scientist, I tried to imagine the Martian nature penetrating ours and turned my attention and energy to the mysterious world under our feet. I took some part time jobs to collect money and buy a magnifying glass and some big 3 litre glass jars. Then I did many exploration trips to a forest and fields nearby to collect specimens of many species of mosses and lichens. I kept that collection in glass jars for a couple of years, watched mosses grow through the magnifying glass, drew sketches and made notes in my diary. I imagined myself a Mars explorer, LOL...
Later I moved to another region, my diaries and sketches were lost , and now I have only warm memories of those beautiful times of miracles. Thank you for this bitter-sweet feeling of nostalgia.
When I came across your thread here I was unpleasantly surprised with the improper use of the term "biotope" in regard to the bacteria inhabited terrarium. Now after a full dive into it I want to start a similar project myself.
You are doing a fantastic research in this mesmerizing bacteria world. Your ideas and DIY equipment are something beyond even my imagination!
Btw, I missed the point of atmosphere in the bacteria biotope: is it the same as in your environment or do you "cook" it to be closer to the Martian?
- Joined
- 22 Aug 2009
- Messages
- 1,092
I formatted a new poster for the Mars terrarium project mainly with pics I had handy already and got it mounted too.


I'm expanding the astrobiology with a new idea, kites, among a few other additional concepts. I'll explain more later when I have more components built, but here is the first kite, a 34" X 45" rokkaku. This traditional Japanese kite design is easy to build and one of the best for lifting payloads.


I also got my Urban Ninja out. This thing is tons of fun and I could fly it for hours.


I'm expanding the astrobiology with a new idea, kites, among a few other additional concepts. I'll explain more later when I have more components built, but here is the first kite, a 34" X 45" rokkaku. This traditional Japanese kite design is easy to build and one of the best for lifting payloads.


I also got my Urban Ninja out. This thing is tons of fun and I could fly it for hours.


Last edited:
MichaelJ
Member
I'm expanding the astrobiology with a new idea, kites, among a few other additional concepts. I'll explain more later when I have more components built, but here is the first kite, a 34" X 45" Rokakku. This traditional Japanese kite design is easy to build and one of the best for lifting payloads.
Your work is profoundly fascinating. And now it turns out you fly kites too! I had so much flying kites as a kid!
Cheers,
Michael
- Joined
- 22 Aug 2009
- Messages
- 1,092
Your work is profoundly fascinating. And now it turns out you fly kites too! I had so much flying kites as a kid!
Cheers,
Michael
Thanks for stopping by! I'll round up a few more things and explain the connection with these ideas.
Kitebuilding and kite flying are really rich areas to explore and a nice way to get outside. If you might want to pick it up again, that Urban Ninja kite is extreme fun to fly and available as a free plan.
Kite project: the urban ninja 2024
That just requires a few specific sewing supplies such as the correct thread for ripstop nylon. I cut a few corners building mine, but it went together fine and flies fantastic. I've spent many hours flying it.
Last edited:
- Joined
- 22 Aug 2009
- Messages
- 1,092
A couple more updates...
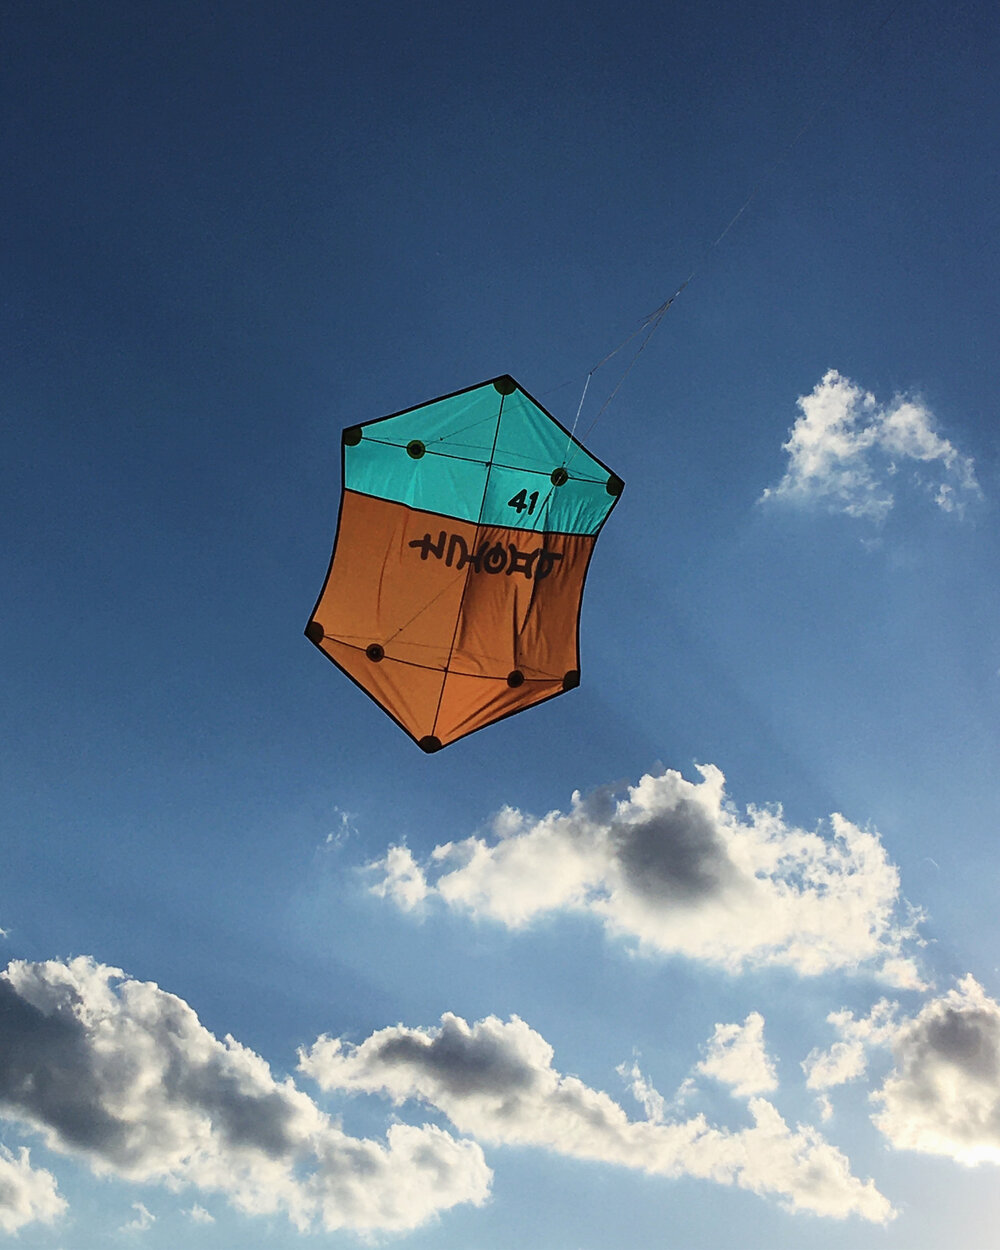
I've built another rokkaku for one of the astrobiology projects. I made this one with a couple of fabric half-yard scraps and it's only 50" tall, so it's probably not big enough to lift the ~4 ounce payload I have in mind with the sensors + data logger (second pic below), but I'll build another one with the same theme and more like 60". That should be enough lift.
Weather looks good for kite flying this week and I'm eager to get this one up in the air.


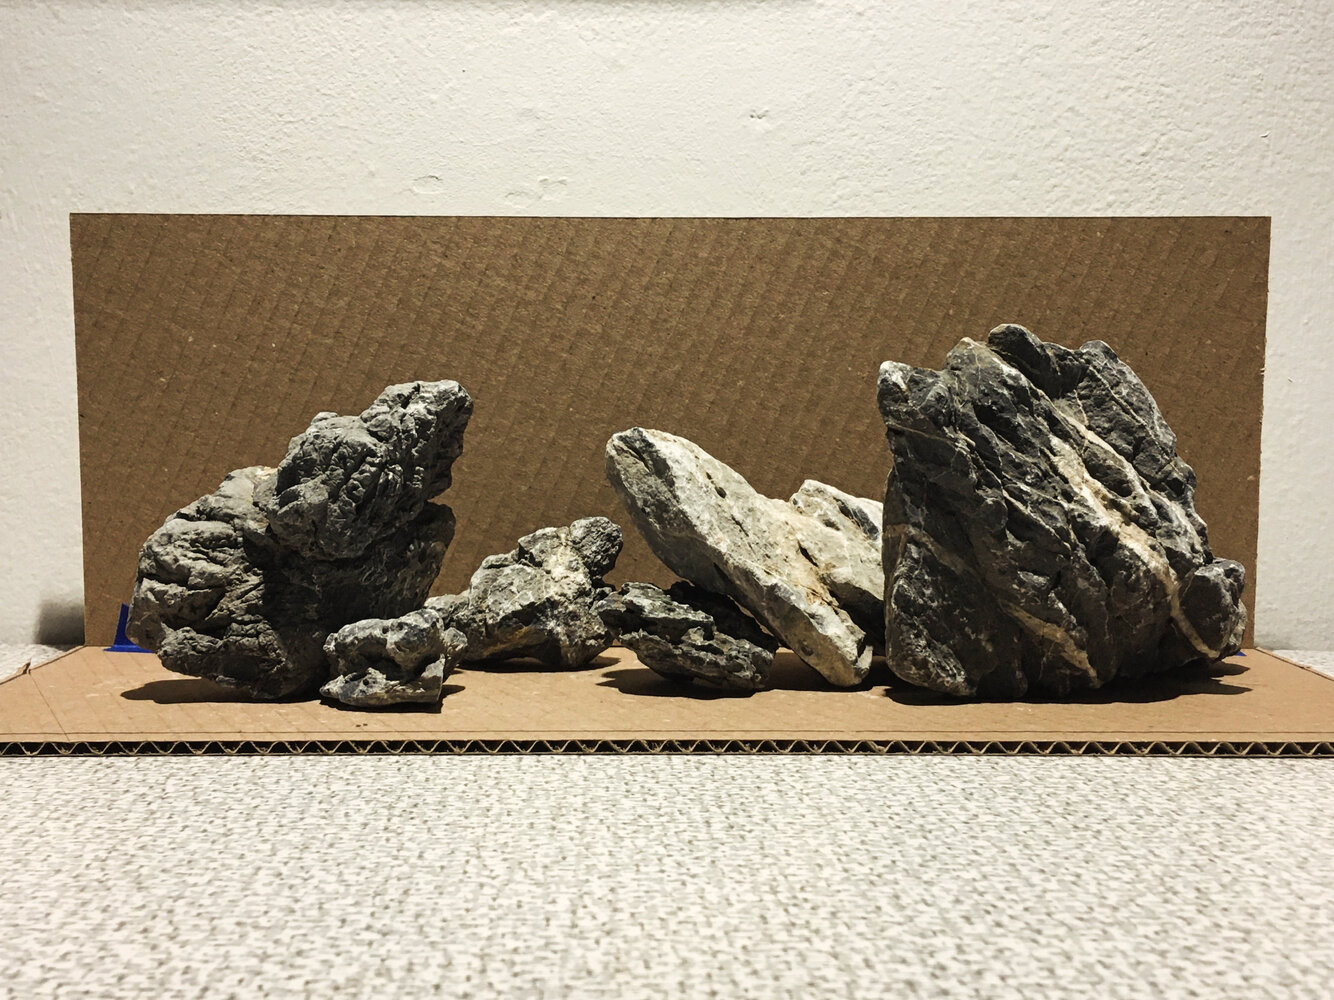
I also rounded up aquascaping rocks for another astrobiology aquarium setup. This approximate layout will go into a 18" X 6.7" UNS tank.

I've built another rokkaku for one of the astrobiology projects. I made this one with a couple of fabric half-yard scraps and it's only 50" tall, so it's probably not big enough to lift the ~4 ounce payload I have in mind with the sensors + data logger (second pic below), but I'll build another one with the same theme and more like 60". That should be enough lift.
Weather looks good for kite flying this week and I'm eager to get this one up in the air.


I also rounded up aquascaping rocks for another astrobiology aquarium setup. This approximate layout will go into a 18" X 6.7" UNS tank.

Attachments
Last edited:
- Joined
- 22 Aug 2009
- Messages
- 1,092
Yes I know. WordPress hosting expired. I'm looking for a better value.Hey FYI, it looks like your studio page is down 😕
I'm looking for a better value
I can vouch for these guys, I use them for my business site. Great up time and world class Tech support, they can solve anything and they're right there on the chat at all hours 👍
- Joined
- 22 Aug 2009
- Messages
- 1,092
Attachments
Last edited:
- Joined
- 22 Aug 2009
- Messages
- 1,092
- Joined
- 22 Aug 2009
- Messages
- 1,092
Hello everyone. I haven't been back here for some time. I hope that some of my friends here are still posting.
I'm still working on various things. Lately I've been getting into more outdoor design/art projects. A fun recent experience from this past fall was a short section of shrubby plants trained with inspiration from the UK practice of hedgelaying used to contain/exclude livestock and delineate properties in farm areas. As a characteristic, historic and ecologically important feature of the countryside there, a lot of effort goes into maintaining British Isles hedgerows as well as the craft of hedgelaying:
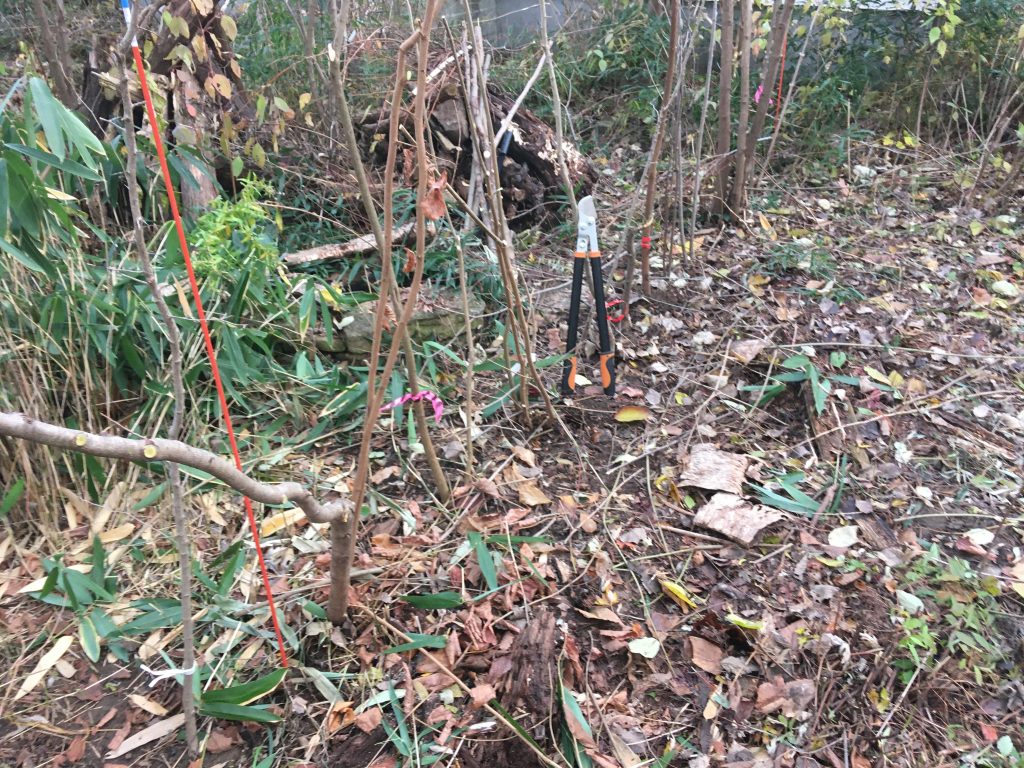
Since I did not have a straight line of established shrubs in my garden area, I made a compromise with dormant-season transplants from elsewhere to fill the space between two existing plants, a Common Witch-Hazel (Hamamelis virginiana) and Silky Dogwood (Cornus amomom). Here's a pic with that short, straight line of stems:
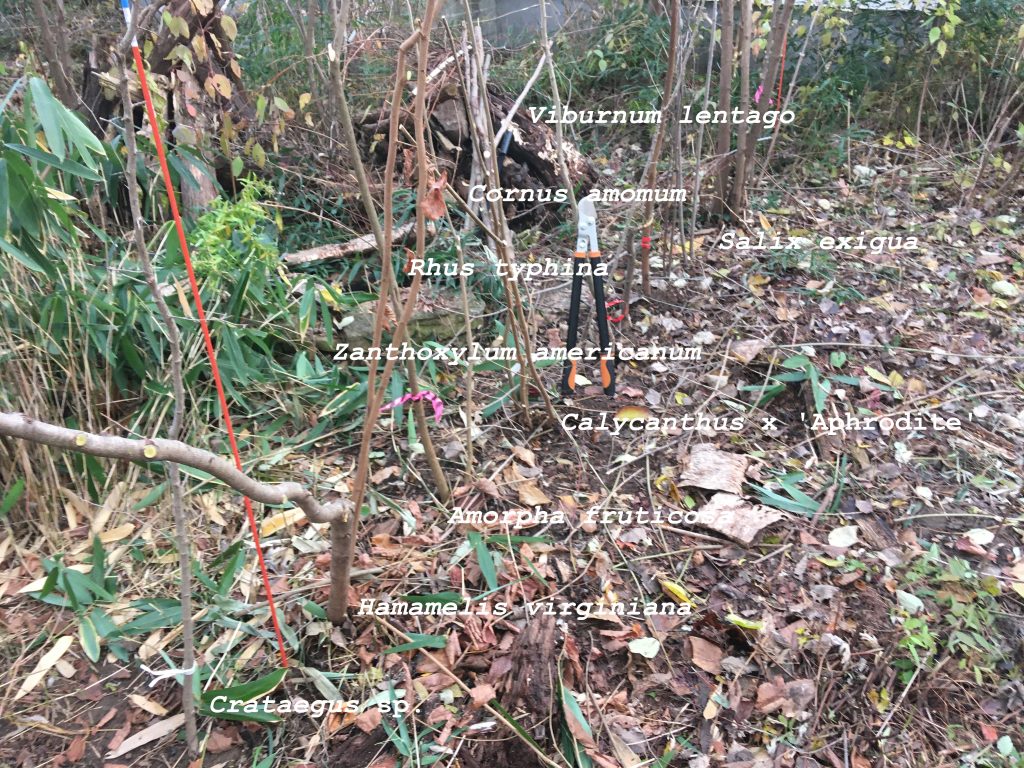
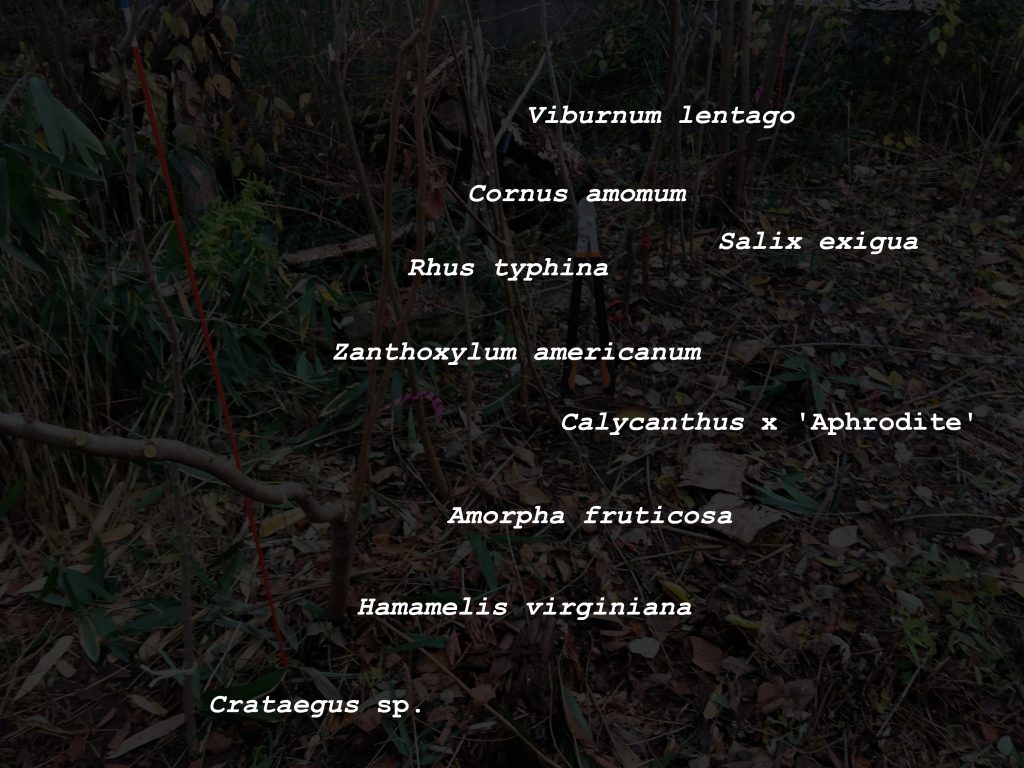
Hedgelayers usually leave most of the branches and twigs of laid stems, but I cut all of these off at a height of 60" and removed most branches to compensate for the transplant root loss. Here's an edited photo showing the plant selections, all but one of which are native to my area here in Wisconsin, USA:
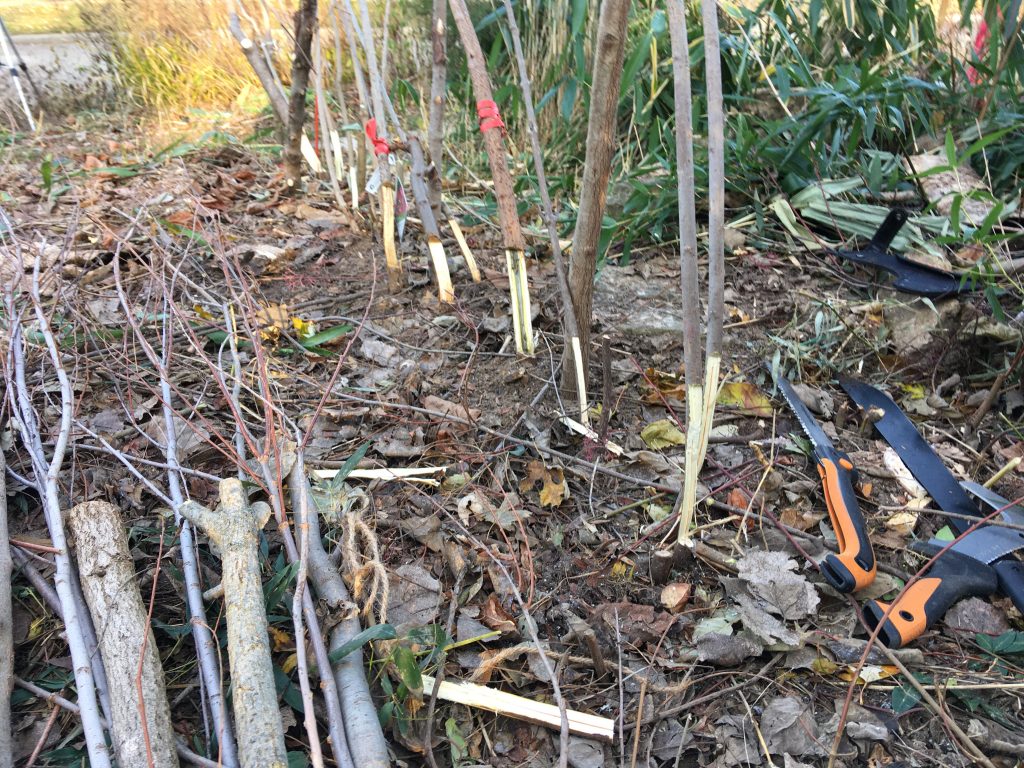
Here are the shrub stems laid at an approximate 30-degree angle. After the partial cut through the stem bases, they are left with just a strip of bark and sapwood, so I provisionally tied them up against stakes with jute twine:
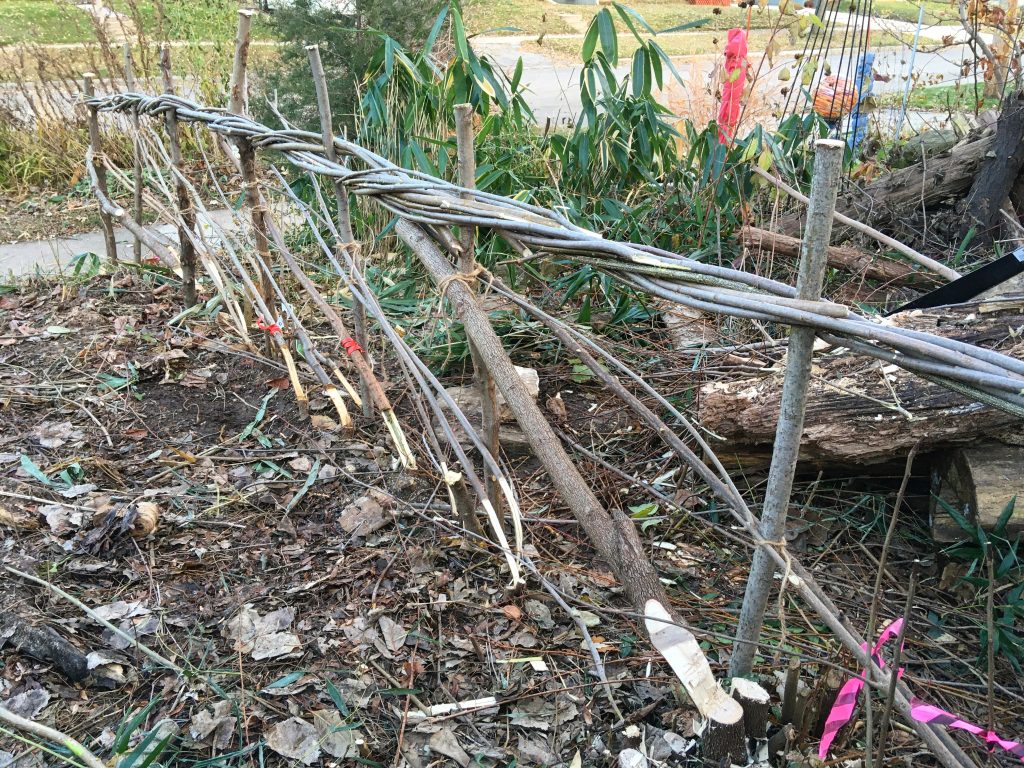
The hedge binding is the really crafty step in the process. Here, flexible Willow (Salix sp.) in two bunches wrap around the stakes with a complete twist between each pair:
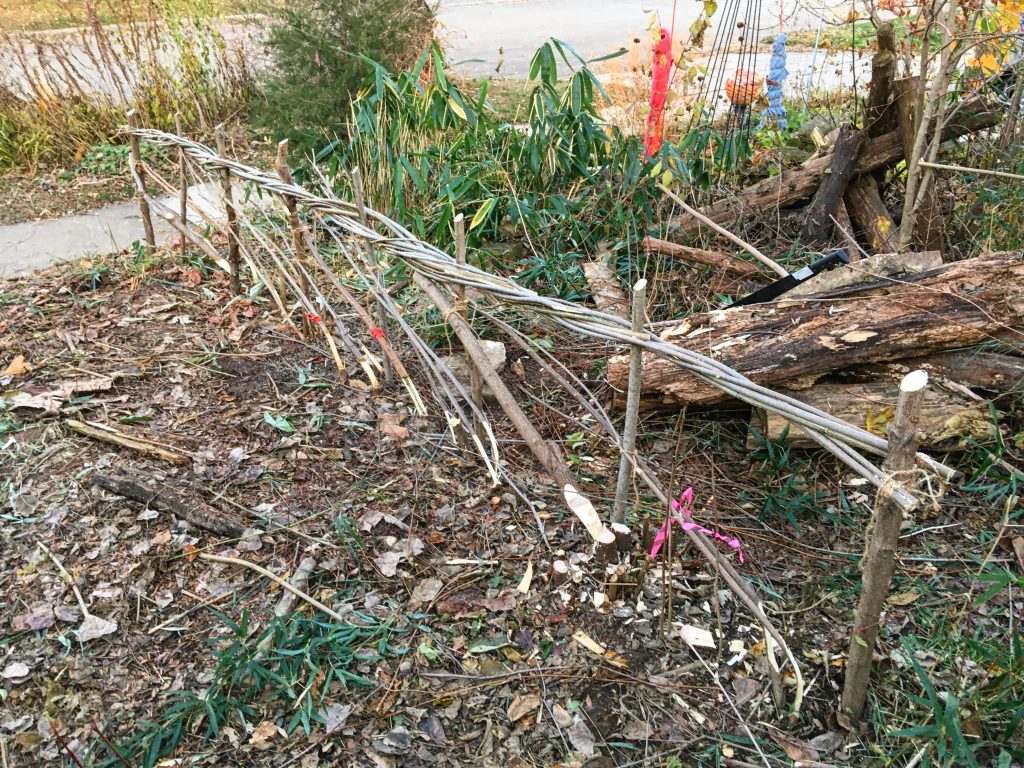
To finish the job, I cut all of the rustic stakes off at an even height. The stakes and binders are dead pieces of cut wood at this point, but with luck the laid shrubs will resprout in the springtime from dormant buds along their stems to grow in as a dense hedge. This short section of hedge serves no real purpose aside from decoration and wildlife value, but it was fun to try training the plants with this traditional method:
I'm still working on various things. Lately I've been getting into more outdoor design/art projects. A fun recent experience from this past fall was a short section of shrubby plants trained with inspiration from the UK practice of hedgelaying used to contain/exclude livestock and delineate properties in farm areas. As a characteristic, historic and ecologically important feature of the countryside there, a lot of effort goes into maintaining British Isles hedgerows as well as the craft of hedgelaying:
Since I did not have a straight line of established shrubs in my garden area, I made a compromise with dormant-season transplants from elsewhere to fill the space between two existing plants, a Common Witch-Hazel (Hamamelis virginiana) and Silky Dogwood (Cornus amomom). Here's a pic with that short, straight line of stems:

Hedgelayers usually leave most of the branches and twigs of laid stems, but I cut all of these off at a height of 60" and removed most branches to compensate for the transplant root loss. Here's an edited photo showing the plant selections, all but one of which are native to my area here in Wisconsin, USA:


Here are the shrub stems laid at an approximate 30-degree angle. After the partial cut through the stem bases, they are left with just a strip of bark and sapwood, so I provisionally tied them up against stakes with jute twine:

The hedge binding is the really crafty step in the process. Here, flexible Willow (Salix sp.) in two bunches wrap around the stakes with a complete twist between each pair:

To finish the job, I cut all of the rustic stakes off at an even height. The stakes and binders are dead pieces of cut wood at this point, but with luck the laid shrubs will resprout in the springtime from dormant buds along their stems to grow in as a dense hedge. This short section of hedge serves no real purpose aside from decoration and wildlife value, but it was fun to try training the plants with this traditional method:

Last edited:
- Joined
- 22 Aug 2009
- Messages
- 1,092
Valeriy Aqyar
Member
It would be nice to watch your further experience in creating and maintaining you hedgerow 😉
Some time ago I came across a video in the Kirsten Dirksen youtube channel explaining the German technology of creating fantastic shapes with tree branches:
Are you going to try anything like this?
Some time ago I came across a video in the Kirsten Dirksen youtube channel explaining the German technology of creating fantastic shapes with tree branches:
Are you going to try anything like this?
- Joined
- 22 Aug 2009
- Messages
- 1,092
It would be nice to watch your further experience in creating and maintaining you hedgerow 😉
Some time ago I came across a video in the Kirsten Dirksen youtube channel explaining the German technology of creating fantastic shapes with tree branches:
Are you going to try anything like this?
Thanks very much for stopping by. Yes I will post an update in the springtime. It will be interesting to see how well the transplants resprout.
There are lots of cool projects like this to do. I've watched a number of those Kirsten Dirksen videos and they a nice source of inspiration. Those Baubotanik living tree structures are fascinating, but something similar you can do with easier and much faster results is to train Salix Willow with live stakes like this.
We have a pretty nice diversity of native Salix in our region. I don't have a lot more space in the yard here, but I have thought it could be nice to accumulate a little collection of them. Willow are nice for sharing/trading because they grow so fast and because they are so easy to propagate with stakes.


- Joined
- 22 Aug 2009
- Messages
- 1,092
It took me approximately forever, but I finally got an article put together for the Great Salt Lake microbialites tank and you can read it in the current (March/April) issue of AMAZONAS Magazine. Check out the issue video preview right here.
Many thanks to the editors at AMAZONAS for helping me with this.
Many thanks to the editors at AMAZONAS for helping me with this.
wearsbunnyslippers
Member
- Joined
- 9 Mar 2009
- Messages
- 345
Nice Devin!
- Joined
- 22 Aug 2009
- Messages
- 1,092
Nice Devin!
Thanks!
Please click like on the video and leave a comment if you have a minute.
wearsbunnyslippers
Member
- Joined
- 9 Mar 2009
- Messages
- 345
"I actually think this might be one of the most impressive and thought-provoking articles we have ever published!" - Amazonas Magazine
That is really quite an achievement Devin!!!
That is really quite an achievement Devin!!!


