• You are viewing the forum as a Guest, please login (you can use your Facebook, Twitter, Google or Microsoft account to login) or register using this link: Log in or Sign Up

Critique my hardscape And Help!!

InNi2010

Member
Joined
6 Feb 2022
Messages
85
Location
Good Ol' Sutton
Hi everyone.
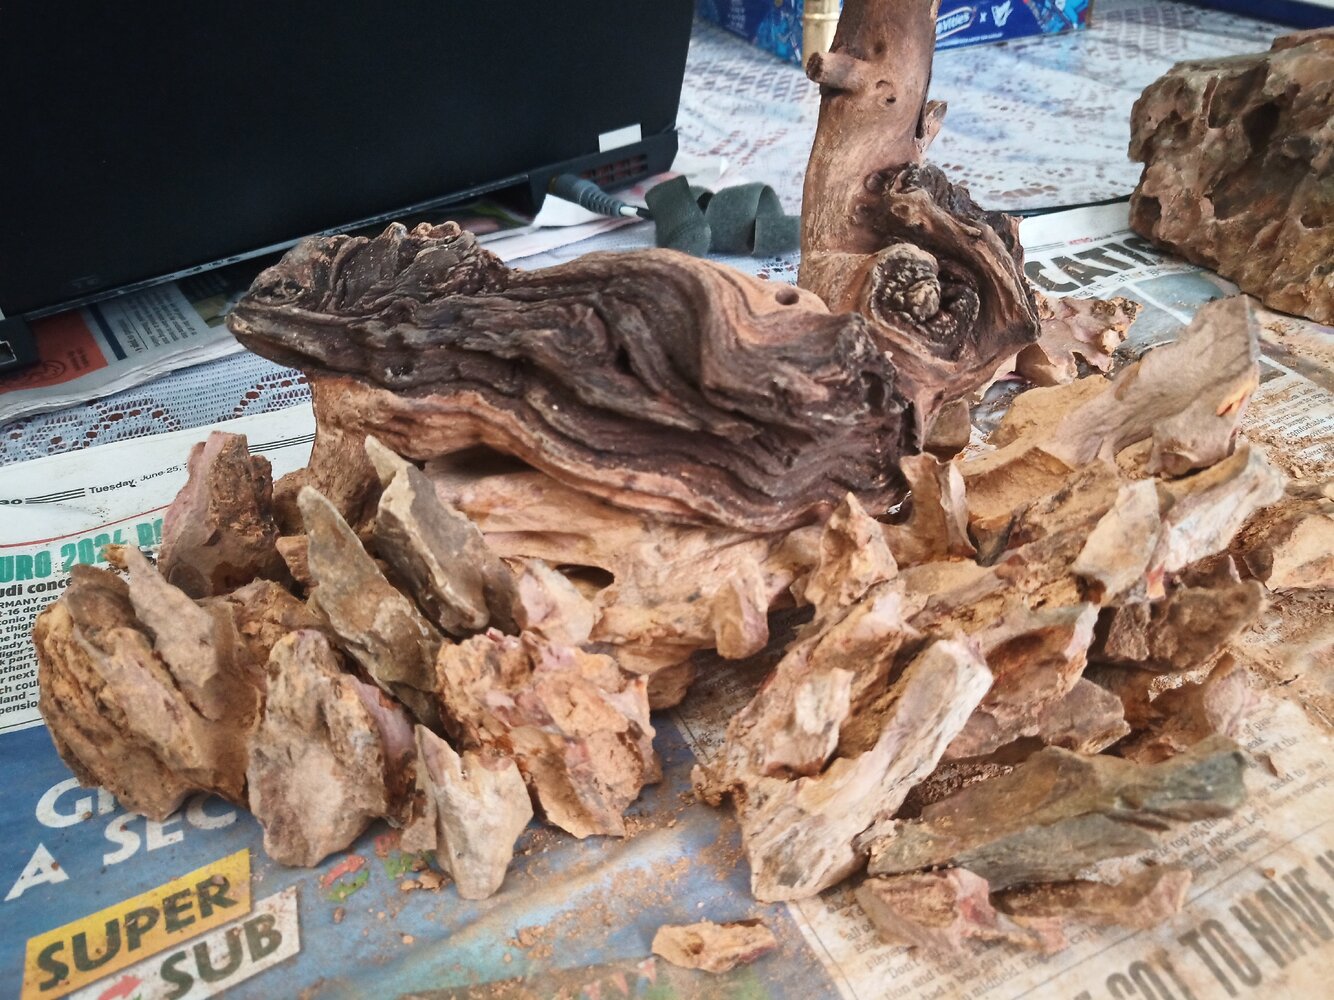
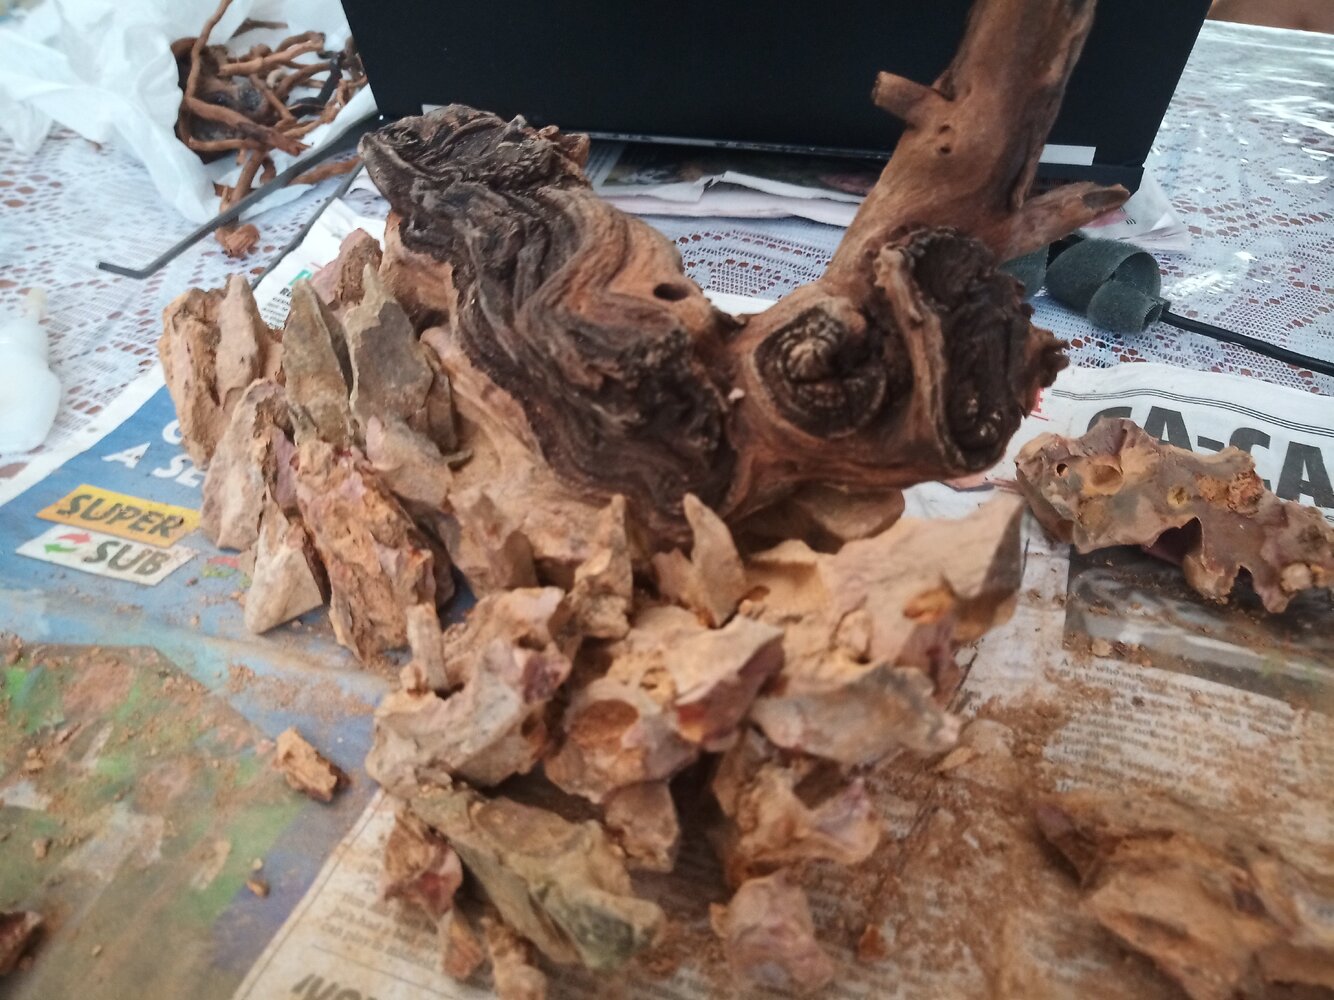
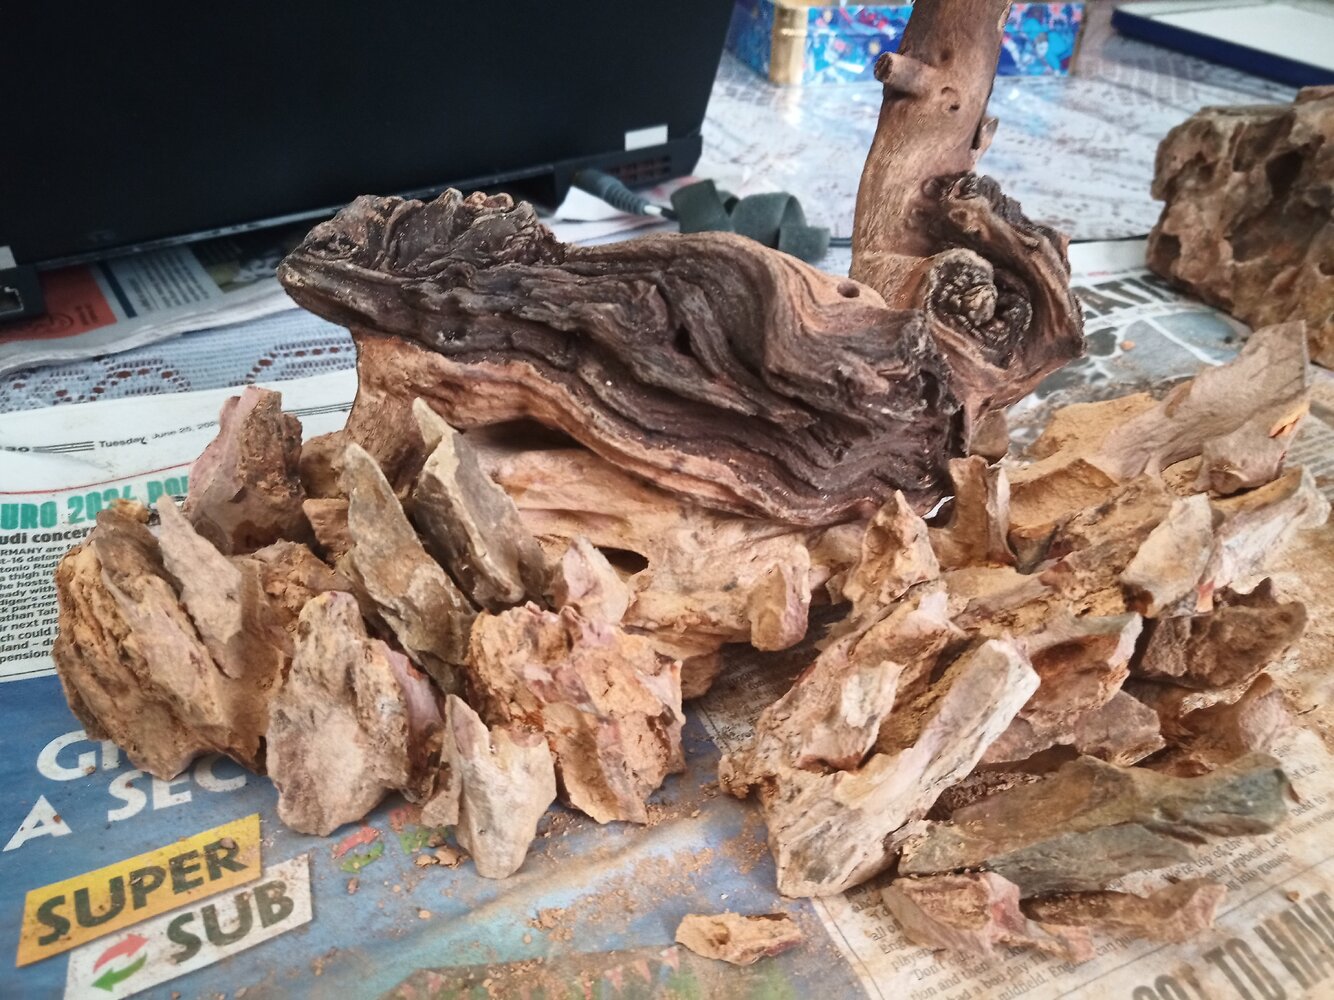
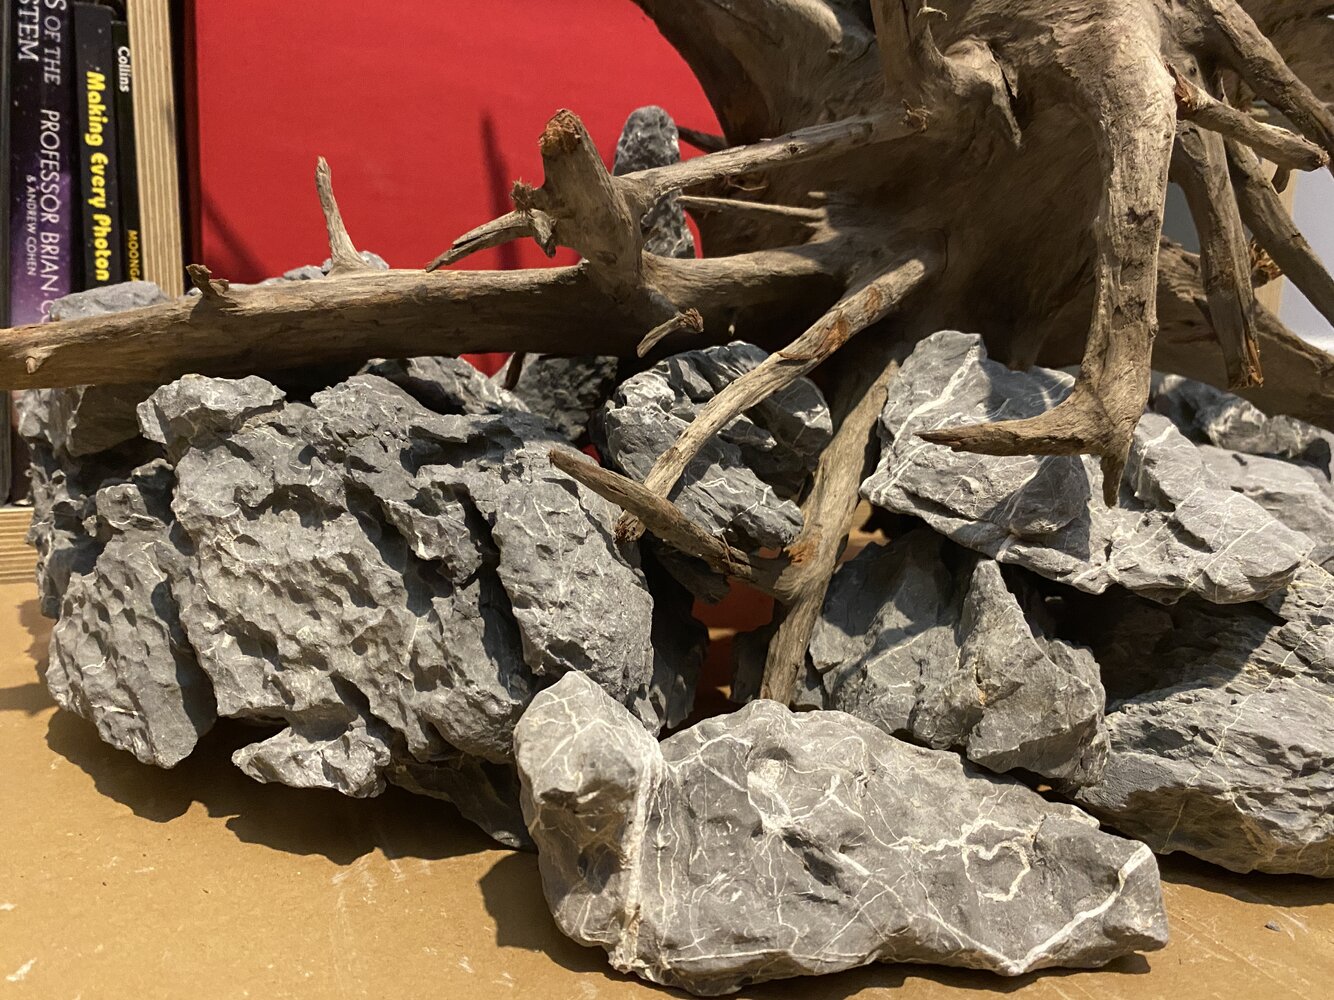
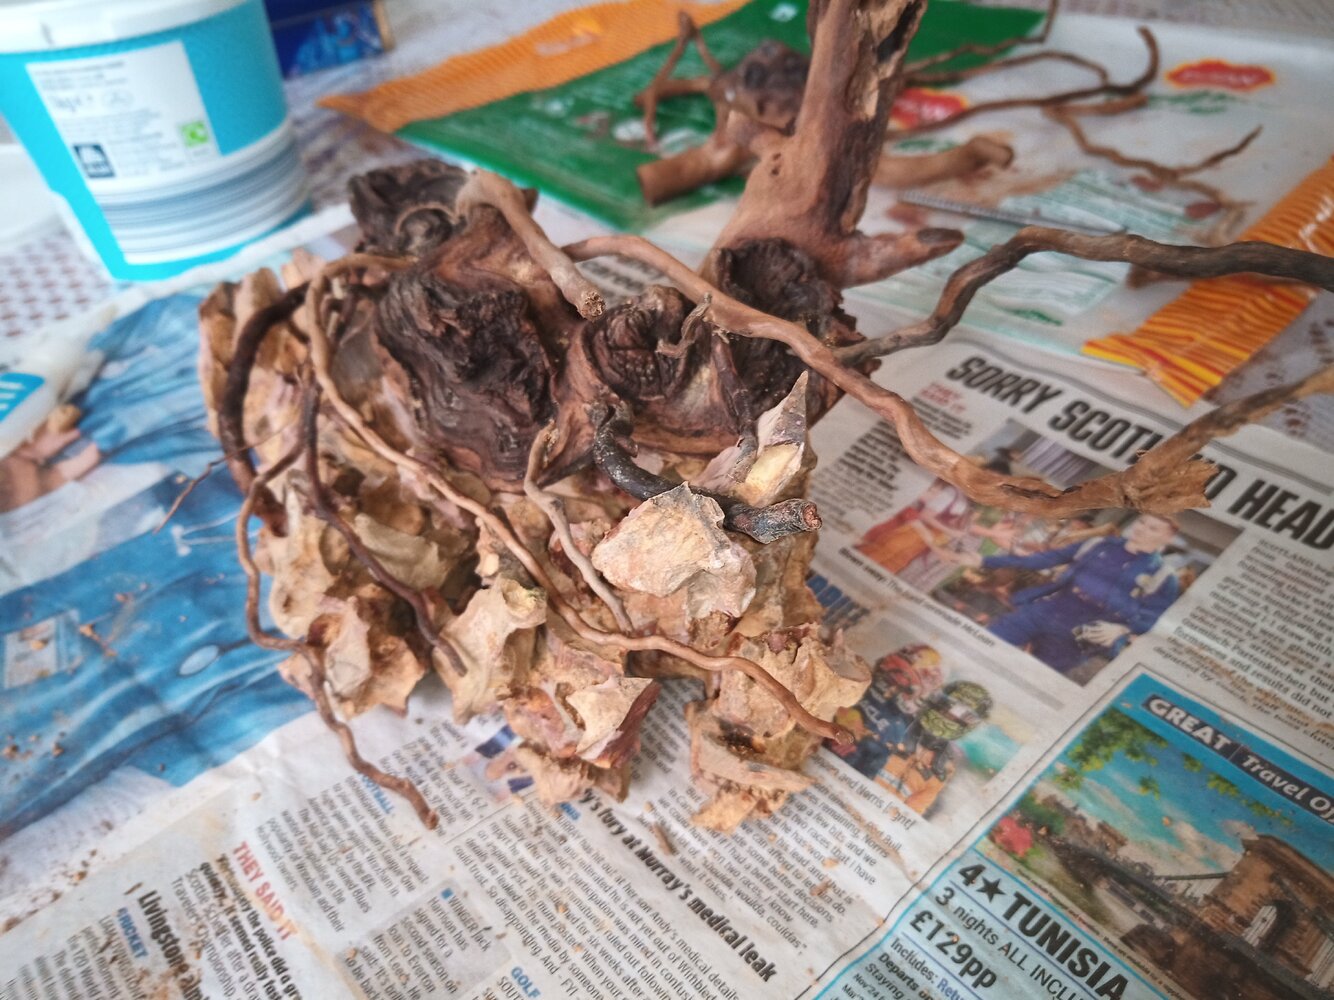
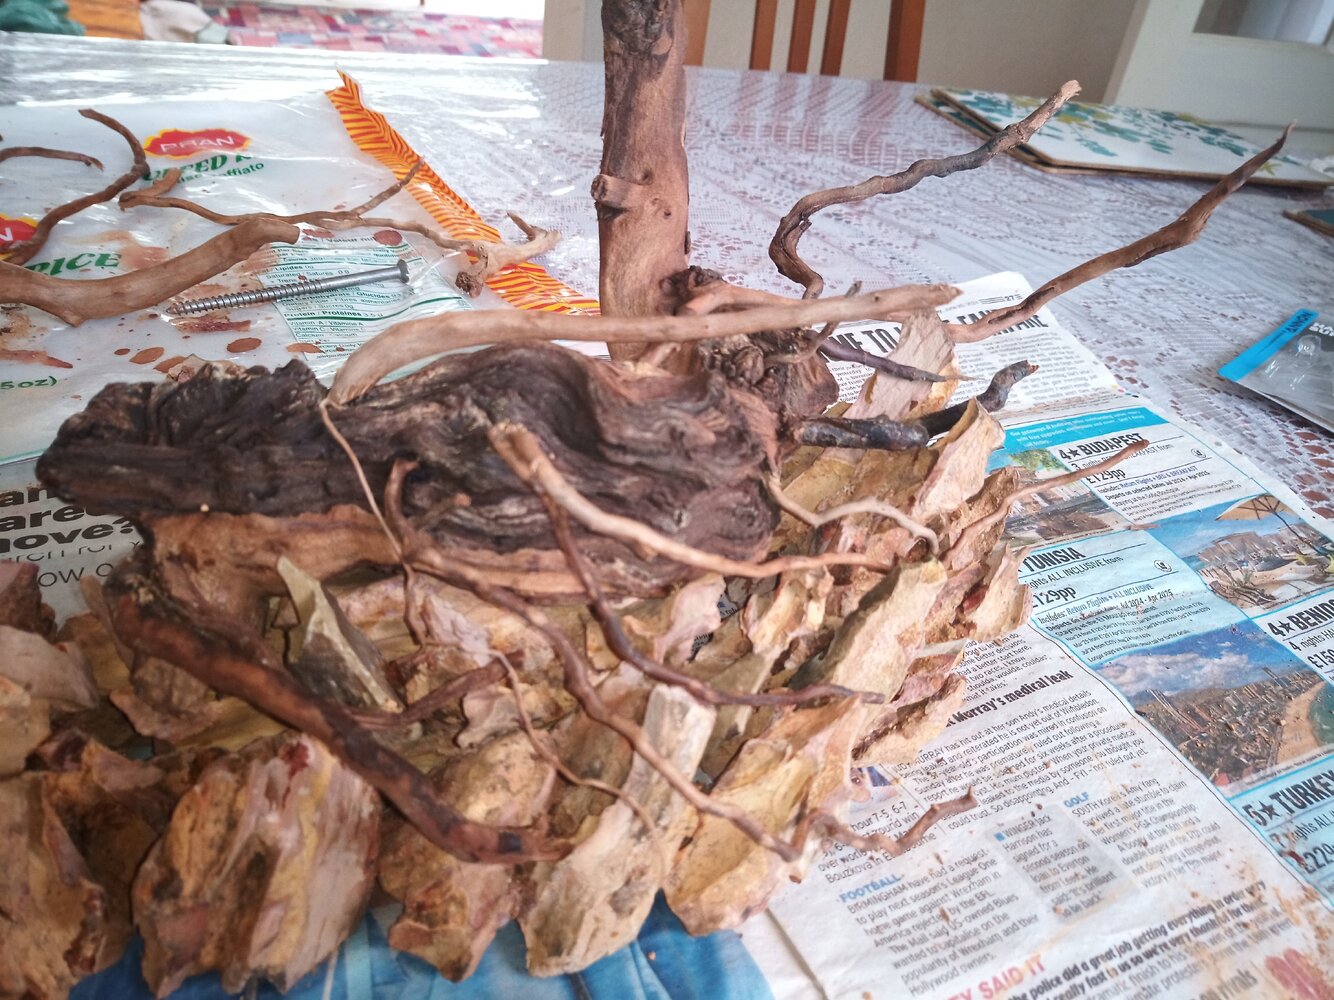
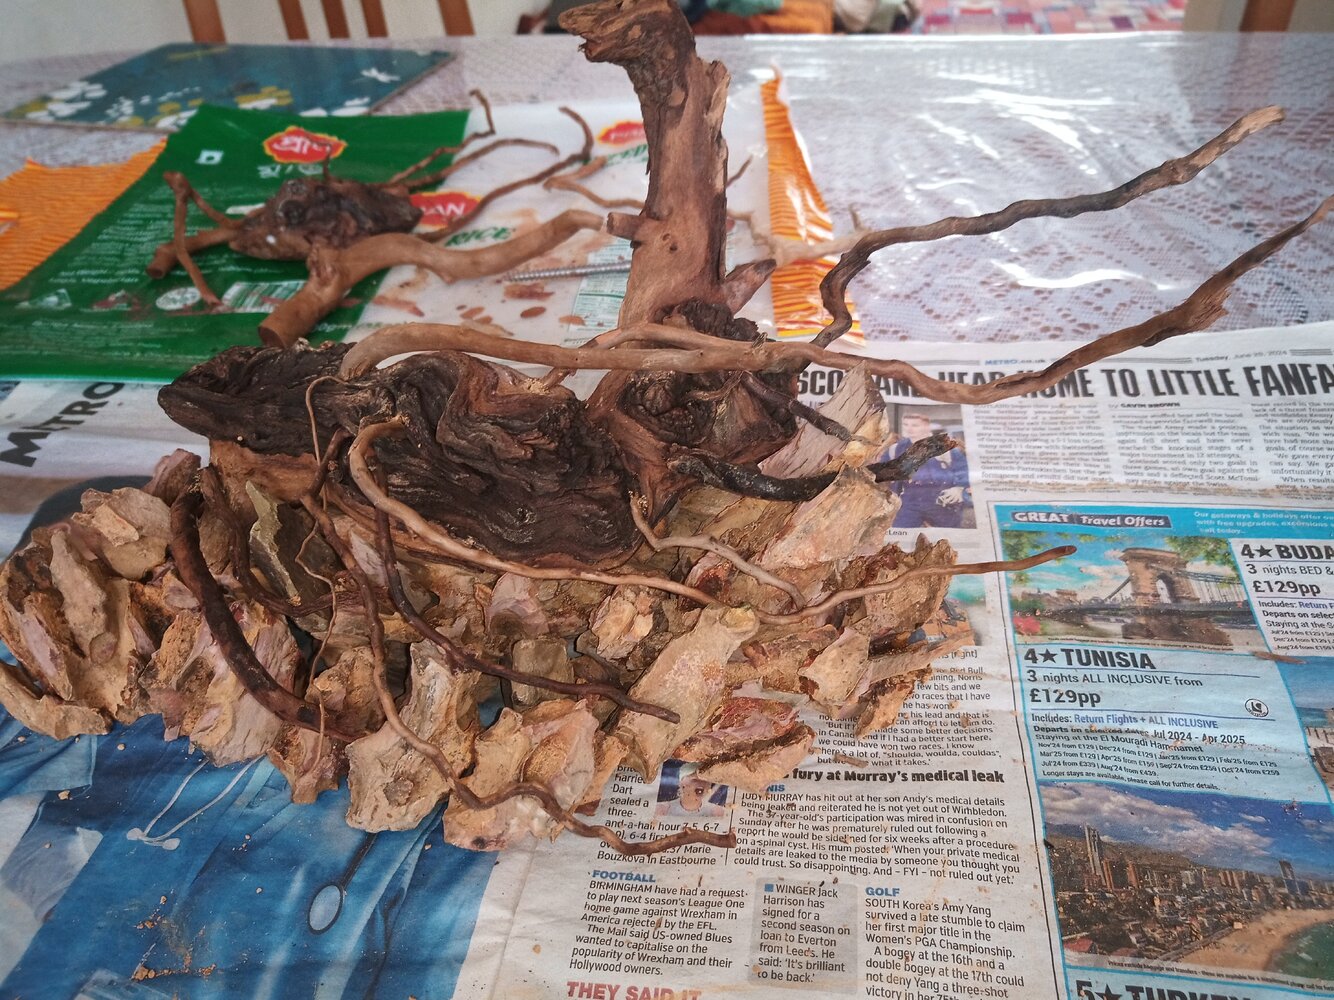
Began brainstorming ideas and browsing and came across nature aquariums and their stunning layout. So bought a 60l a while back and decided for a triangular layout scape. The rock is that dragon stone thingummy and I'll be adding more pieces of driftwood and spider wood to accentuate the detail. I am a newcomer to the hobby, criticism, opinions and suggestions are welcome!
 

Attachments

  • 17237384649965531284869476414869.jpg
    17237384649965531284869476414869.jpg
    2.4 MB · Views: 90
  • 17237384915723785693412953404167.jpg
    17237384915723785693412953404167.jpg
    2.1 MB · Views: 75
  • 17237385148464512360688746075014.jpg
    17237385148464512360688746075014.jpg
    2.2 MB · Views: 72
Hello,

Could you maybe use aquarium silicone (thus fish safe) to “seal” the rocks back together?

I know Dragon Stone can break easily - Stuff will need a wash (pressure washers but not to harsh a setting on the machine or a good go over with a hose)

I’m doing an island style with Seiryu this is my rough idea so far. I quite like trying to incorporate the wood into and around the rocks just like you would have in nature.

You will sort it out it can be frustrating but the end point is worth it 😊
 

Attachments

  • 5AD8E120-88B2-4EBF-82DC-2B025B1CA703.jpeg
    5AD8E120-88B2-4EBF-82DC-2B025B1CA703.jpeg
    3.3 MB · Views: 61
  • B686D559-3DAF-444E-8D4C-ECCF6BE51149.jpeg
    B686D559-3DAF-444E-8D4C-ECCF6BE51149.jpeg
    3.1 MB · Views: 75
That looks amazing!!
I originally thought to wash it once I made the initial structure but seems like that won't work. Do you know any substitutes of silicone that can be used; doesn't seem like the rock will hold up with super glue
 
HA6 is good, safe and cheap. It might be worth fixing the hardscape to a sheet of something fish safe so you can lift it easily. Also gives you more to fix to, though possibly with dragon stone you risk or being more annoying to reuse. I think perspex is fine, but someone may correct me. Remember to consider your substrate depth so you don't lose detail you want to be able to see. I fell for that one before. The whole thing looked so different once I added the substrate.
 
Ran out to my LFS and got
Guess what happens when you rush: it's for saltwater aquariums and it has this a purplish colour and smears horribly when I tried it out on some other rocks, and I finally read 'Coraline Algae'
Is there any way I can remove these stains and mask them up (in a rushed attempt I started rubbing those little granules of sand thingys from the rock, desperately trying to add a natural 'pigment' :crazy:)

I'd recommend JBL Pro Haru in preference to aquarium silicone. Whenever I have used silicone in the past, it sticks great to rocks, but has problems with the wood - once its been wet for a while it just comes loose.

Also with the superglue method, I wouldn't have thought tissue paper would work. You need synthetic cigarette filters. The bonding action comes from an exothermic reaction between the synthetic fibres in the filter and the cyanoacrylate super glue. During the reaction (which gets vey hot and smokes a bit) the fibres kind of reform into a solid chunk of plastic-like material, bonding very strongly with what they are attached to (including your finger if its in the way - been there! 😅)

In terms of dealing with your new coraline rocks, you could try chipping or sanding it off, using those damaged sides downwards in your layout so they aren't seen, or as a last resort some clear epoxy resin over the top with dust/granules from the rocks pressed into it.
Thank you for the idea @Wookii !
I'll try out sanding some of the putty and chipping it away, it has started to cure and its almost solid
For superglue I think I'm a bit too young to purchase the filters (restrictions on tobacco related products) but I'll have to ask a parent 😅
Also tried out the Bicarb trick and seems to cure faster and creates a stronger bond
I'll have a look out for the JBL adhesive.
Thanks! :thumbup:
 
Ran out to my LFS and got
Guess what happens when you rush: it's for saltwater aquariums and it has this a purplish colour and smears horribly when I tried it out on some other rocks, and I finally read 'Coraline Algae'
Is there any way I can remove these stains and mask them up (in a rushed attempt I started rubbing those little granules of sand thingys from the rock, desperately trying to add a natural 'pigment' :crazy:)
The stuff starting to cure in 3-4 hours but broke a few times due to mishandling, reinforced it with super glue and seems to do the trick for the smaller shards, filling gaps for awkward spaces.
I'd recommend JBL Pro Haru in preference to aquarium silicone. Whenever I have used silicone in the past, it sticks great to rocks, but has problems with the wood - once its been wet for a while it just comes loose.

Also with the superglue method, I wouldn't have thought tissue paper would work. You need synthetic cigarette filters. The bonding action comes from an exothermic reaction between the synthetic fibres in the filter and the cyanoacrylate super glue. During the reaction (which gets vey hot and smokes a bit) the fibres kind of reform into a solid chunk of plastic-like material, bonding very strongly with what they are attached to (including your finger if its in the way - been there! 😅)

In terms of dealing with your new coraline rocks, you could try chipping or sanding it off, using those damaged sides downwards in your layout so they aren't seen, or as a last resort some clear epoxy resin over the top with dust/granules from the rocks pressed into it.
Went out yesterday and my LFS didn't stock the JBL adhesive, could've bought it off the internet, unfortunately I'm too impatient :sorry:!
Hello,

Could you maybe use aquarium silicone (thus fish safe) to “seal” the rocks back together?

I know Dragon Stone can break easily - Stuff will need a wash (pressure washers but not to harsh a setting on the machine or a good go over with a hose)

I’m doing an island style with Seiryu this is my rough idea so far. I quite like trying to incorporate the wood into and around the rocks just like you would have in nature.

You will sort it out it can be frustrating but the end point is worth it 😊
Did try out silicone for some of the larger pieces but seems like it's taking a while to cure!! Hopefully it will stick together well.
I finally decided with whatever brain I have left and figured out not to glue the entire thing together but to stick 'parts' that I can place in the tank :clap:
Cotton wool also works. I actually prefer it to filters because it's easier to rip up
I tried out gauze swabs and are much more easier to stuff in small nooks and work much more better than tissue...
Thank you, @Wookii , @Spartacus , @richardcunliffe ; hopefully this is going to be a good one!
Now I think it's time for the wood, not using multiple big pieces but pieces of spider wood for a cohesive look, seems like super glue will do the job
Will keep this updated, maybe a journal?
 
Wood and all!
Super glue works just fine... I think
All left for it is to place it!
What do you guys think?
 

Attachments

  • 17239013615346571360271775930953.jpg
    17239013615346571360271775930953.jpg
    2.2 MB · Views: 40
  • 17239013452391861498859799019111.jpg
    17239013452391861498859799019111.jpg
    2.4 MB · Views: 38
  • 17239012920197886041301916165118.jpg
    17239012920197886041301916165118.jpg
    2.9 MB · Views: 45
Put the hard scape in the tank, opinions? I'm open to any criticism, quite new to the hobby... And if anyone says add depth to the back of the tank just know I've used all the substrate I've got :/
 
Put the hard scape in the tank, opinions? I'm open to any criticism, quite new to the hobby... And if anyone says add depth to the back of the tank just know I've used all the substrate I've got :/
 

Attachments

  • 17239206278007005550074594654039.jpg
    17239206278007005550074594654039.jpg
    2 MB · Views: 44
  • 17239206563952613972228940426075.jpg
    17239206563952613972228940426075.jpg
    2 MB · Views: 42
  • 17239206720214838053514582459299.jpg
    17239206720214838053514582459299.jpg
    2 MB · Views: 38
  • 17239207080034797650745718601639.jpg
    17239207080034797650745718601639.jpg
    1.7 MB · Views: 48
And if anyone says add depth to the back of the tank just know I've used all the substrate I've got :/
I've always found the substrate will end up pretty level anyway especially with shrimp unless it is banked up with something solid. In the past the use of a spray bar also alleviated this problem with the flow going from front to back across the substrate.
You could always remove the soil and put a couple of bags of lava rock in then cover them over. Taking time right now and not rushing, getting it pretty much how you want it will save regret in the future, however having said that, all I can see in my tank now is plants with hardscape and substrate being totally concealed (inlet and outlet top and front of the tank not included).
 
Thanks for the suggestion @bazz, I'll try scoop back up the substrate and place pieces of slate (which might just work??) underneath, nice idea! Also would an element of depth be provided one i add plants in size order, say background towards the foreground and at the front? (in a sort of size gradient)
 
You've built a cool thing for sure. I would have more impact in a smaller tank, and as bazz mentioned, may get lost in plants in not too long. If you've got any more bits of rock I'd use them in a couple of spots in your retaining wall and in the sand area to help the hardscape design fill the space better
Apart from the visual thing, your substrate depth may frustrate you when trying to plant. Maybe use what you have all in that back left corner and do epiphytes elsewhere to give you more to plant into? Not sure that back wall toward the right is going to be much use to you
Taking time right now and not rushing
Plus one for this.
What is your intent for stocking? I'd assume given the large sand area you're thinking cories?
 
You've built a cool thing for sure. I would have more impact in a smaller tank, and as bazz mentioned, may get lost in plants in not too long. If you've got any more bits of rock I'd use them in a couple of spots in your retaining wall and in the sand area to help the hardscape design fill the space better
For the wall, I'll try to break down some pieces I've got with a hammer and fill in shards towards the front for a thinning out kind of effect and perhaps use spider wood that extends out to the front and into the sand 'bay' (as I like to call it :angelic:
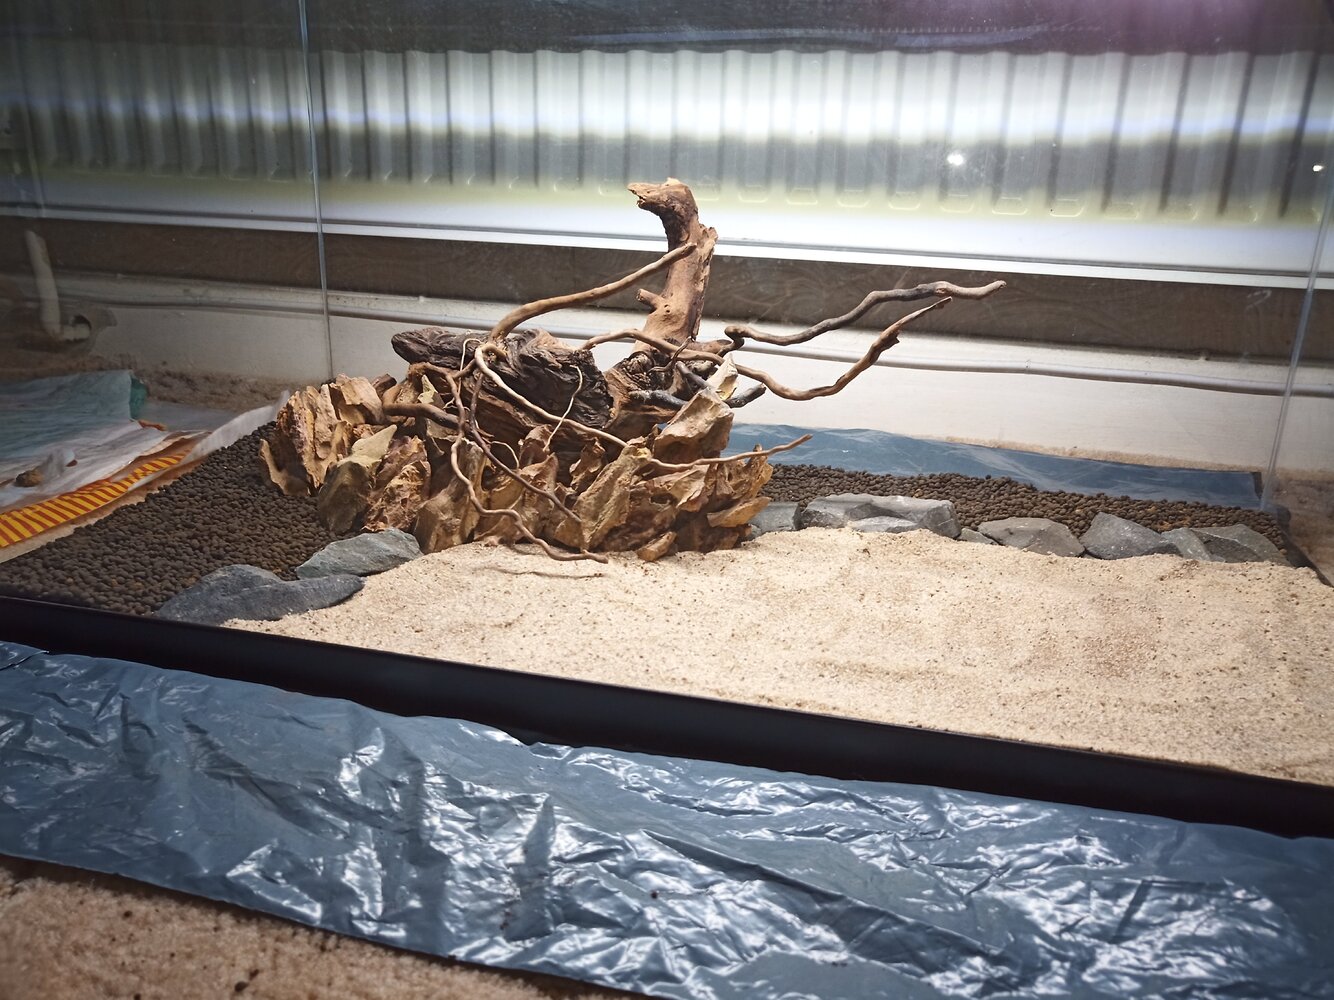
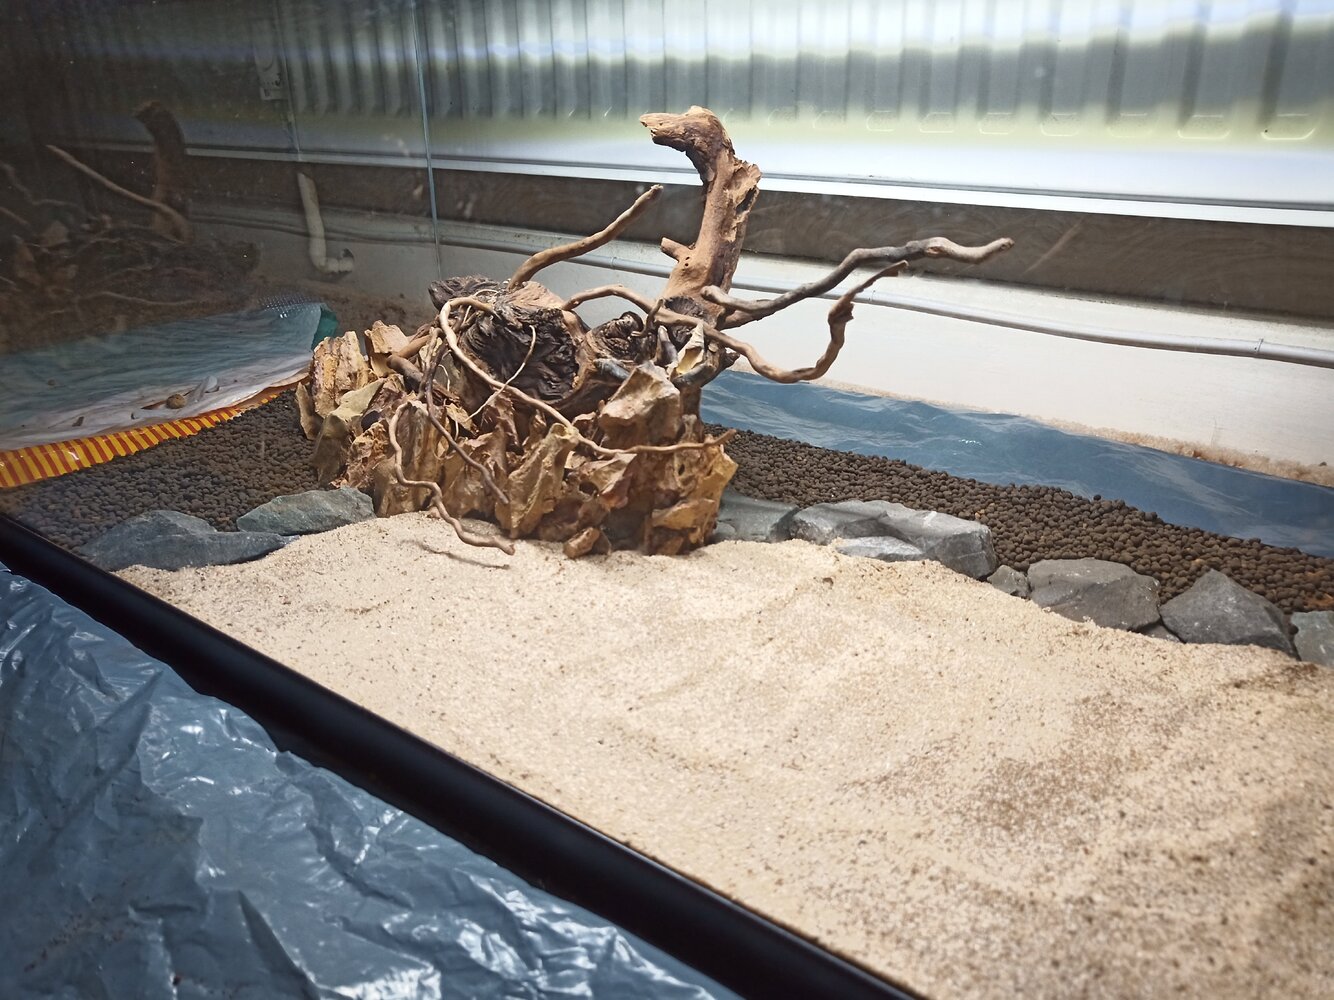
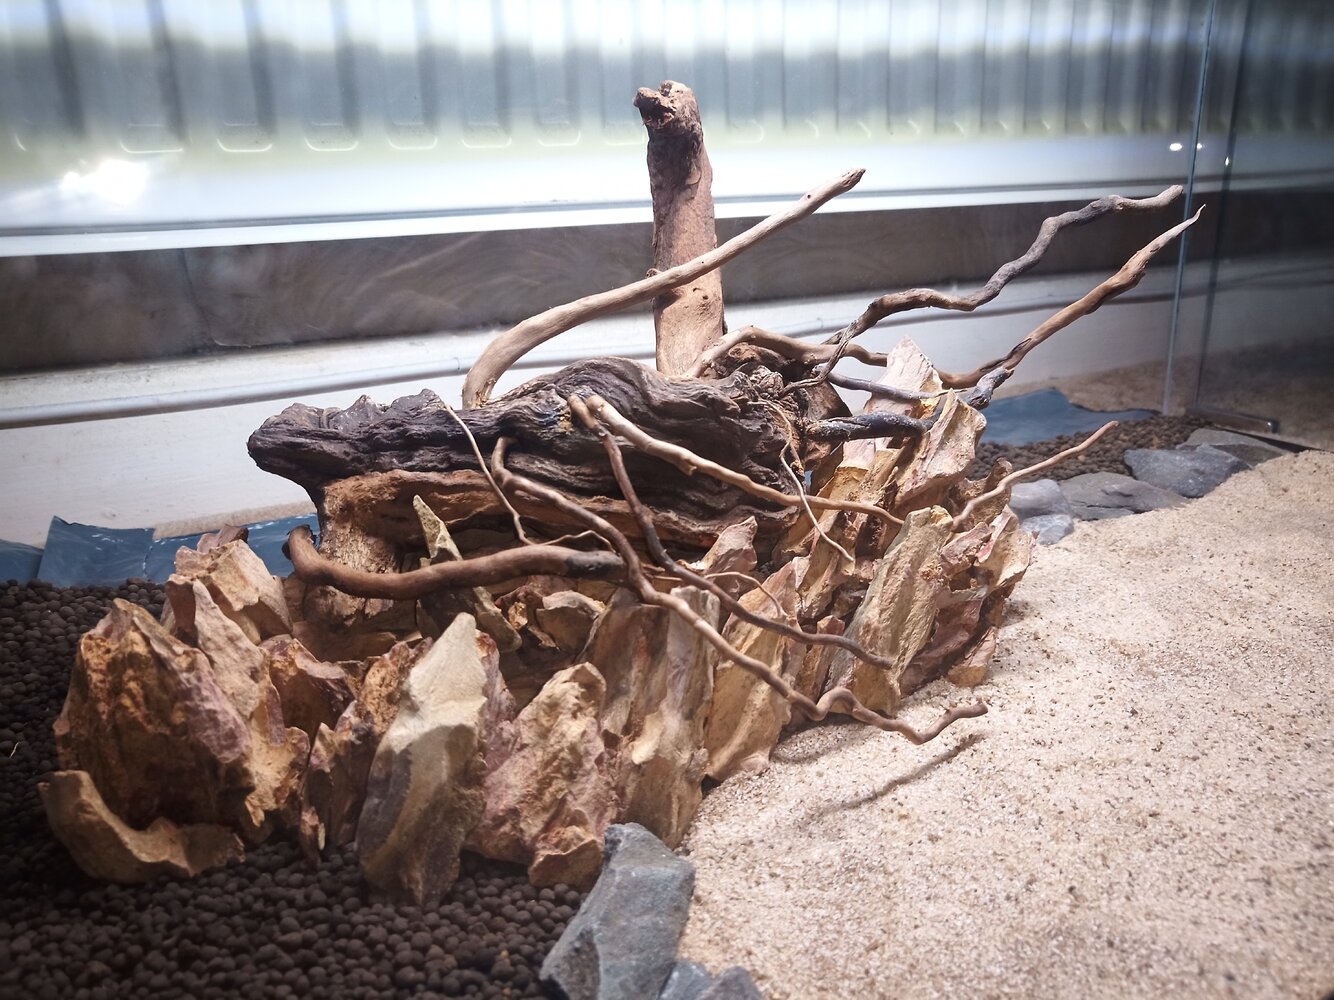
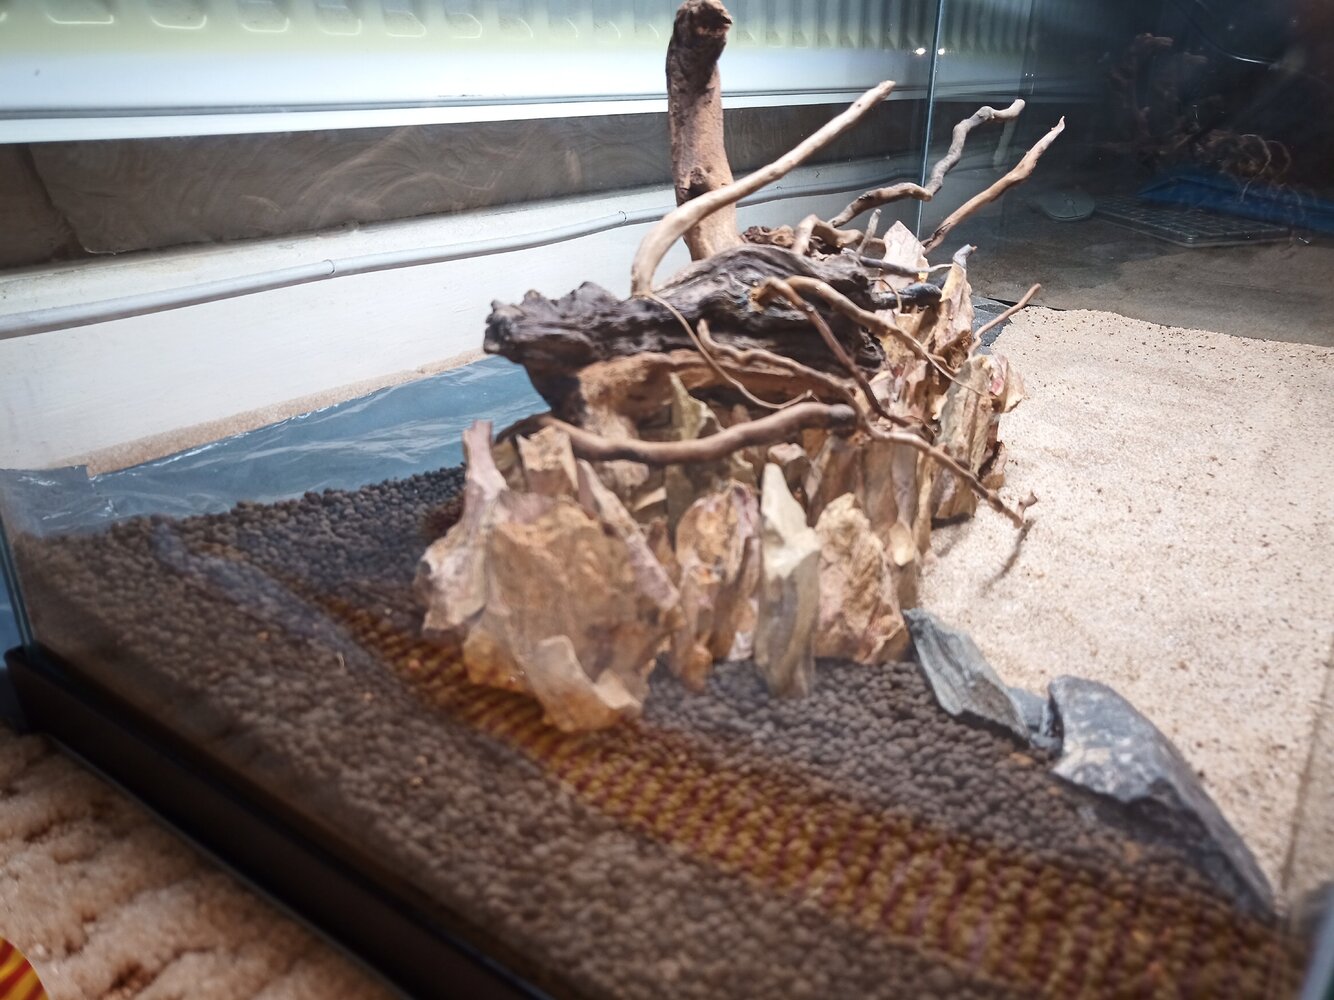
) which, I would like to think, simulates roots meandering towards the substrate and maybe a larger piece as a focal point, pointing upwards; if you've probably noticed the 'striations' and the jagged points facing the top right corner, that's a good sign!
Plus one for this.
Are you suggesting I should rescape it and try a different layout? I don't mind!
What is your intent for stocking? I'd assume given the large sand area you're thinking cories?
Unfortunately, if you have noticed, I don't have the stand at the moment which my people are using to store books and stuff :grumpy: so I guess it looks like I can't fill it up to the brim yet where it will be quite heavy, and unsafe on the floor. But I don't mind cycling for a month or so and let plants grown in (and then draining it out and placing it) ...
Stocking-wise I did some research and came up with 2 ideas. My choice is seldom centric to the fish that occupy the different levels of tank, but seems like I could make it a more cohesive community.
Stocking:
a)
  • 10 to 15? neon tetras or similar, 15 might be on the large side
  • a pair of Electric Blue Rams
  • and as you suggested! 4 or so corydoras possibly Panda or Sterbai, but I'll mainly look out for pygmy corydoras, or I was thinking otocinclus to keep algae issues at bay but at that point what would be the point of a sand bay
Strayed away from endlers and guppies as they've 'overun' my other tanks and I want a change this time!
b)
  • a couple of rasboras, probably 6-8 harlequin rasboras or 10+ chilli rasboras or a small group of dwarf neon rainbows
  • a few? or a pair of dwarf gouramis
  • cherry shrimp or some bottom dwellers
 
Back
Top