• You are viewing the forum as a Guest, please login (you can use your Facebook, Twitter, Google or Microsoft account to login) or register using this link: Log in or Sign Up

The Wild Dutchman and the "fish room"

ShawnMac

Member
Joined
4 Aug 2015
Messages
123
Location
ND, USA
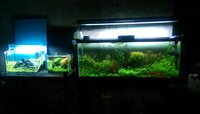
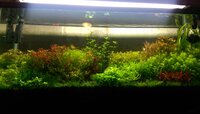
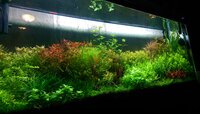
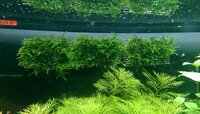
Thought I would take a little time to share my fish room and the 55 gallon tank I've named "The Wild Dutchman". The tank is home to various plants, mostly stems, that I keep while my display scapes are up and running. It is always helpful to have some plants on hand. I've recently cut down on the number of plants I keep submerged because plant availability is improving and I no longer feel like it would be difficult or expensive to buy them when needed.

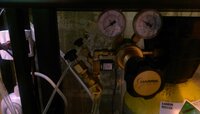
Over the years I've gathered an assortment of equipment, most goes unused, but can serve as a back up or could be needed from time to time. A hospital tank is easily thrown up or housing for additional fish or shrimp not living in one of my few display tanks. The room also serves as a nice place to tinker with different things.
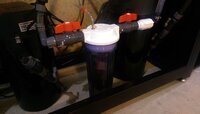
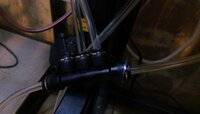
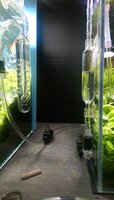
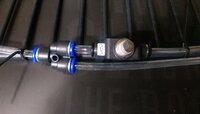
Some photos:

?temp_hash=666ed9260bb9b8fcefb38e07546a63d0.jpg


?temp_hash=666ed9260bb9b8fcefb38e07546a63d0.jpg


?temp_hash=666ed9260bb9b8fcefb38e07546a63d0.jpg


?temp_hash=666ed9260bb9b8fcefb38e07546a63d0.jpg


?temp_hash=666ed9260bb9b8fcefb38e07546a63d0.jpg


?temp_hash=666ed9260bb9b8fcefb38e07546a63d0.jpg


?temp_hash=666ed9260bb9b8fcefb38e07546a63d0.jpg


?temp_hash=666ed9260bb9b8fcefb38e07546a63d0.jpg


?temp_hash=666ed9260bb9b8fcefb38e07546a63d0.jpg
 
you need at least one more tank.

this is just my back room. I have two display tanks on my main level. A 90 cm and a 30 cm. The 45 in the picture was taken down and the fish added to the hardscape tank until I get the 45 up and running again. One day I hope to get a 120 or 180 cm :D
 
this is just my back room. I have two display tanks on my main level. A 90 cm and a 30 cm. The 45 in the picture was taken down and the fish added to the hardscape tank until I get the 45 up and running again. One day I hope to get a 120 or 180 cm :D
Like I said, you need at least one more tank :D
 
Wow cant imagine how your display tanks look like!
Questions:
A. the powerhead seems to be not aligned with the spray bar. Is that correct? What purpose does it serve?
B. What substrate & ferts regime you are using?
C. Is the spray from spraybar strong enough to hit front glass?

Thanks and well done!!!
:thumbup:


a) that is correct the spray bar and powerhead are not aligned. This isn't ideal placement, but the ecotech is strong enough it does not supplement the spray bar or the flow of the tank. It is the primary source.
b) I am using aquasoil over the top of lava rocks. The lava rocks were simply added to save on aquasoil and get some substrate depth. I was only using old used aquasoil I've held onto over my years of scaping. Usually any baked clay soil with a good CEC (action exchange capacity) is a good soil. I guess you could say my fert routine is random interval EI ;) I try to dose when I remember, but this tank is out of sight so out of mind. It gets dosed 2-3 times a week with what would be the EI daily dosage. Sometimes not at all for a week or so. This is where the good soil comes into play and the CEC's ability to sequester extra nutrients for the plants to uptake when not as available in the water column. Plant health is good, but algae does get on the glass over time. This is a low work tank...water changes maybe every 2-3 weeks at 50%...maybe more frequently.
c) the spray bar can and will hit the front of the glass and push the flow down, but it is intercepted by the flow from the pump which is stronger. I use the spray bar primarily to ensure a good spread of CO2 mist.

PS. my flickr account has most of my display tank photos ;)
 
I forgot I had posted this up here and went to start a new thread! :banghead:

Here is a quick update of where things are now.

I've added plants to the Wild Dutchman and it is a bit crowded. I have some plans to put in a terrace system to help elevate the plants and divide the groupings better. The height of the 55 gallon proves to be a challenge. I'm losing leaves and getting some stem melting in the didiplis diandra at the bottoms. The tips are growing nicely, but with the shading in the corner it figured it didn't need to be rooted to the substrate.

I've setup a new scape in the 45 cm and added an entirely new high tech 30 cm nano which replaced the low tech one. My CO2 for all tanks runs off a single dual stage reactor which splits into two at a manifold with a metering valve on each. One valve feeds the 55, the other valve feeds into a 5 way splitter which then runs to each of the smaller tanks. There is a flow control valve on each line to regulate CO2 flow. I purchased the splitter and flow control valves from www.pneumadyne.com. It is much cheaper than going through a shop that sells this type of equipment for hobby use. It is identical and cost considerably less. For example, an ADA flow control valve costs about $26 USD, a pneumodyne flow control valve costs roughly $6 USD. Some quick phone photos of the CO2 distribution:

?temp_hash=0025743ebfbff69b39f922403e388bb3.jpg


?temp_hash=0025743ebfbff69b39f922403e388bb3.jpg


?temp_hash=0025743ebfbff69b39f922403e388bb3.jpg


?temp_hash=0025743ebfbff69b39f922403e388bb3.jpg


The 55 is running a DIY cerges reactor that works fantastically. Total build cost was around $30 USD. I will probably do this for any large systems that I do. If anyone is interested I can post up a parts list and how I did it. It is very simple....it'd have to be...I'm not some DIY wizard that is for sure ;)

?temp_hash=0025743ebfbff69b39f922403e388bb3.jpg


Here are some photos:

?temp_hash=0025743ebfbff69b39f922403e388bb3.jpg


?temp_hash=0025743ebfbff69b39f922403e388bb3.jpg


?temp_hash=0025743ebfbff69b39f922403e388bb3.jpg
 

Attachments

  • IMAG0488_BURST002.jpg
    IMAG0488_BURST002.jpg
    978.6 KB · Views: 391
  • IMAG0522_BURST002.jpg
    IMAG0522_BURST002.jpg
    1.3 MB · Views: 114
  • IMAG0524_BURST002.jpg
    IMAG0524_BURST002.jpg
    1.5 MB · Views: 400
  • IMAG0528_BURST002.jpg
    IMAG0528_BURST002.jpg
    1.3 MB · Views: 388
  • IMAG0489_BURST002.jpg
    IMAG0489_BURST002.jpg
    1 MB · Views: 393
  • IMAG0490_BURST002.jpg
    IMAG0490_BURST002.jpg
    926 KB · Views: 412
  • IMAG0491_BURST002.jpg
    IMAG0491_BURST002.jpg
    1.1 MB · Views: 393
  • IMAG0492_BURST002.jpg
    IMAG0492_BURST002.jpg
    1.3 MB · Views: 399
  • IMAG0495_BURST003.jpg
    IMAG0495_BURST003.jpg
    1.1 MB · Views: 396
On the 55 gallon I made a system I lovingly refer to as my "Poor Man's Auto Doser". It consists of a timer (capable of timing in seconds), two Tom's aquatic aqualifter pumps, two flow control valves, two bottles for fertilizers, and some tubing. I use the flow control valves to set a drip rate. I think calculate my dosage over time and set the timer. At the moment it drips in about 10 ml per 40 seconds for each line. It works well as far as I can tell. I did have one near catastrophe with it, one morning I had bumped the power strip with the timer and it turned on. I did not notice and went to work for the day. When I returned home I noticed the tank was rust colored, so I checked the fertilizer bottles. Sure enough, the system ended up dosing the entire contents...about 2 months worth of EI dosing. I did three subsequent water changes and had no losses of shrimp with some minor melting in plants. It was more my fault than the systems, but it is a vulnerability to using an unsophisticated timer in this way.

If anyone is interested I can share some photos of the setup.
 
Incredible tanks and pics. The small gla tank has to be one of my favourites I think. Had fun looking through your Flickr album also. Amazing work.
 
Time for an update. Over the last week the 55 has developed some green water, I'm not quite sure what induced it...but I suspect that some spores came along with the moss I put into a floating breeding container for holding. Its not a big deal as I have a big UV sterilizer. I purchased it when I was setting up my first high tech tanks many years ago. I wasn't exactly sure what equipment was all needed to make these big beautiful lush planted tanks, so I was getting everything I heard was important. I also bought substrate heating cables, which have yet to leave their box (totally unnecessary). I don't run the UV sterilizer as a regular piece of equipment, it just isn't needed, but when I get green water (rarely..maybe 3 or 4 times in the last 7 years) it is the best way to clear it up. I could probably clear it faster by also adding a micron filter to the tank...I just haven't taken the time to do so.

I also re-setup the "Poor Man's Auto Doser" and its been working smoothly. Put in some root tabs as well. The plants have responded nicely, the tank is very full and healthy. I'll get a photo posted soon.

I let the nano go too long between trims, so it was quite overgrown by the time I got to it. When this happens I like to cut it way back and basically start again bushing things out. It helps the lower portions of the stems recover and grow new healthy shoots. Its also really tough to shape when its so overgrown. I think for long term maintenance of a tank with lots of stems and very thick growth an occasional drastic cut back keeps things healthy and the scape going.

The 45 cm has filled in and I've fought back the algae. With the light so high and the planting density lower in an iwagumi type planting it is just likely to happen. Photos soon.

have a good weekend everyone!
 
Water is clear, the UV filter did it's job

sent from tapatalk on my phone so auto correct and other errors are bound to happen
 
some update shots from today via the camera phone

?temp_hash=e16f7d0598326b904912862c5958ecee.jpg


Rotala macandra, Rotala macandra "green", and Rotala macandra "narrow leaf"
?temp_hash=e16f7d0598326b904912862c5958ecee.jpg


dramatic angle
?temp_hash=e16f7d0598326b904912862c5958ecee.jpg


the long view
?temp_hash=e16f7d0598326b904912862c5958ecee.jpg


My betta friend in the "near zero" scape
?temp_hash=e16f7d0598326b904912862c5958ecee.jpg


I've recently taken some extra moss and begun tying it around some stainless steel mesh. I then used seachem flourish glue to attach an eheim suction cup to the back. It sticks to the thread not the steel, but allows me to stick the moss to the side of the tank for propogation

?temp_hash=e16f7d0598326b904912862c5958ecee.jpg

?temp_hash=e16f7d0598326b904912862c5958ecee.jpg


*to save time I copied the posting from ASW. please let me know if you are unable to see the photos due to the images being hosted there.
 

Attachments

  • ?temp_hash=e16f7d0598326b904912862c5958ecee.jpg
    ?temp_hash=e16f7d0598326b904912862c5958ecee.jpg
    1.7 MB · Views: 59
  • ?temp_hash=e16f7d0598326b904912862c5958ecee.jpg
    ?temp_hash=e16f7d0598326b904912862c5958ecee.jpg
    1.7 MB · Views: 56
  • ?temp_hash=e16f7d0598326b904912862c5958ecee.jpg
    ?temp_hash=e16f7d0598326b904912862c5958ecee.jpg
    1.7 MB · Views: 63
  • ?temp_hash=e16f7d0598326b904912862c5958ecee.jpg
    ?temp_hash=e16f7d0598326b904912862c5958ecee.jpg
    1.7 MB · Views: 61
Back
Top