• You are viewing the forum as a Guest, please login (you can use your Facebook, Twitter, Google or Microsoft account to login) or register using this link: Log in or Sign Up

Olympus is Calling.

Weekend update

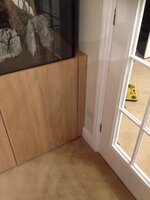
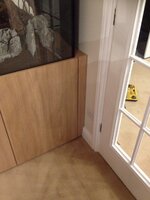
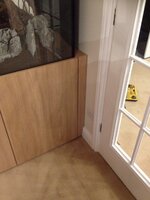
Tank has arrived 😀 its big and weighs a ton. Delivery guy put it in my garage with neighbour. Me and a friend struggled to get the cabinet in the house think it weighs more than the tank. Need three to four people to get tank in house so thats happening next week when my daughters are home for weekend with their partners.

upload_2016-11-13_8-32-10-png.12071.png

upload_2016-11-13_8-23-50-png.12070.png

Plenty of room for canisters etc
upload_2016-11-13_8-33-12-png.12072.png

Ordered my extra plumbing bits and pieces yesterday, for the inline diffusors/heaters being 16mm fittings and piping being 25mm,

rough sketch

upload_2016-11-12_11-52-33-png.92318


Similar design for twin heater side too
plus custom spray bars for 25mm piping, then added a fill drain point to the independent loop for WC, so can add water easy from say PEGLER PEG402 TMV 15MM form wash room to tank with hose, might even add solenoid so it stops filling working form PLC, should work off sensor that auto-top up would use.

CO2 wise got it ready but not everything in stock 😡 was after UP High Precision pH Controller for short term use to get the CO2 input levels right (plus help me monitor some of the 'crazy dog' ideas I plan to try) Plus 10% off first order so best to get everything at once. So plan to e-mail them and see what we can work out 😉

Kessil wise ordered a 'gooseneck' to see how integrate the Tuna sun A160 works with my braced/hooded (open hooded) tank, before I commit to getting another three 😉

PLC wise - happy with software works well on demo program, (Kudos due to 'ian_m' on here for the many pms bouncing back an forth) Got a contact in the industry and seeing what price he can pick the modules up at before I commit. 😉

Auto doser - checked out some decent peristaltic pumps (four rollers) but yet to decide on how many, but no rush on this as can always use manual route short term.

Auto top up - not really looked at this but should be straight forward PLC side plus need to see how much room in cabinet when done, plus see what water loss is like with hooded tank too.

Off to 'The Green Machine' on Thursday meet James and his team, pick there brains/tips/tricks etc get the hardscape materials AS etc

Lots to do and plan

Happy days 😀

Zeus
 
weekend update

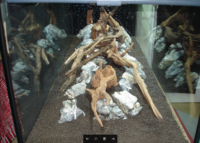
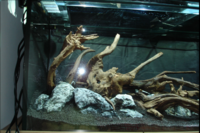
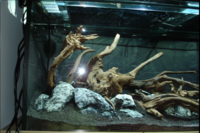
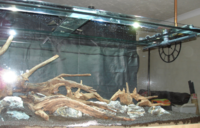
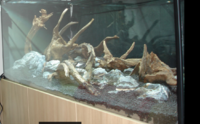
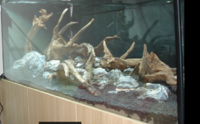
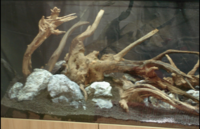
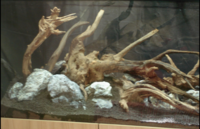
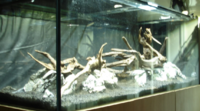
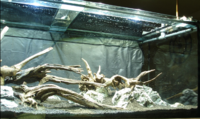
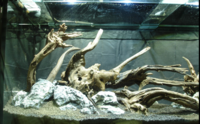
Been really busy with going down to TGM spent a small fortune. Got tank in with help. Clean Stone/wood, got on with hardscape.

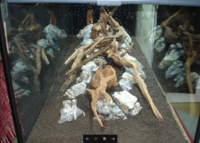
its not finished, still playing with the rocks and wood as it doesnt feel right yet OFC, poor pics also due to reflection but got some black garden lining for the next ones I'll do at night, plus only one kessil ATM

img_1325-jpg.12103.jpgimg_1327-jpg.12104.jpgimg_1334-jpg.12105.jpg

need more AS ofc and lots of tweaks positioning wise, so just a little update of how its going, working with the wood rocks and trying to get them to work as a whole. But very happy with how its going as a whole 😀

will ask for critique once close and with better pics 😉
 
I'm not great with scaping but your last snap looks great! The only thing I notice, is the rock one from the left has a very strong point which might be a little distracting to the overall look - otherwise looking great...roll on updates!!!
 
Exciting stuff! Hardscape looks great so far, you going for minimalist or jungle style planting?

Joe
 
Exciting stuff! Hardscape looks great so far, you going for minimalist or jungle style planting?

Joe

well would say 'nature' but not aiming at a style 'per sa' just doing it as I like.

The list of plants 'Gaz' at TGM thought suitable was, got my markers ready

Cyperus hefferi
3.JPG
Staurogyne repens
3.JPG
Alternathera reinideri 'mini'
3.JPG
Micranthemum 'monte carlo'
3.JPG But not as a carpet just between some of the rocks
Echrinodorus tennelleys (helenathsum)
3.JPG

Anablas bart nano 'petite' (on wood)
3.JPG
Cryptuconyne parra
3.JPG
Linderhia tohindifulia
3.JPG
Bucepandoreia wavy green (on wood)
3.JPG
Mosses ( dribyone/weeping moss)
3.JPG
Microseruim trident
3.JPG


But Still think its worth getting both sides with rock that works together first place wood estimate light in areas as will be shadows too, can always adjust spacing, getting to know each rock personally :LOL:

------------

Made a Noob mistake forgot the support for the rocks etc

eg

?temp_hash=edb615dc0a2125fa2a80a2f0e579ca26.jpg

so got myself some porous pavers. stripped the tank except the ADA PS and bridge the PS

upload_2016-11-24_21-22-51-png.12122.png

got myself a power planer and have been rather busy.


wall panels fitted to base, QD OFC (y)
img_1373-jpg.12144.jpg

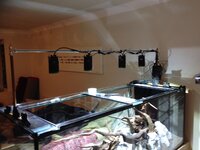
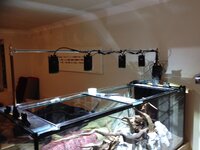
Kessil light hanger (temp OFC) reduced height and width so can position lights in center or move six inches to enable to see the difference having eight would make to both sides. soldered and compression fitting from cache

img_1375-jpg.12143.jpg

Finding it hard to get a decent photo of hardscape as there isnt a fixed viewing position so any I take look much poorer than the naked eye , tried taking video on iphone but then the 100Mb file refused to send via email to PC complete noob at taking videos then getting them right size to publish, would read how to do it but got other things to do :LOL:. Getting close to want I'm happy with but need to take it all out to adjust the porous pavers 'maybe'. Was at LFS with son ,which had a few pieces of sieryu stone which had my name on them too .

Still a way off before critique time
 

Attachments

  • upload_2016-11-24_21-22-51-png.12122.png
    upload_2016-11-24_21-22-51-png.12122.png
    1.1 MB · Views: 274
  • img_1373-jpg.12144.jpg
    img_1373-jpg.12144.jpg
    312.1 KB · Views: 264
  • upload_2016-11-24_21-22-51-png.12122.png
    upload_2016-11-24_21-22-51-png.12122.png
    1.1 MB · Views: 281
  • img_1373-jpg.12144.jpg
    img_1373-jpg.12144.jpg
    312.1 KB · Views: 260
  • img_1375-jpg.12143.jpg
    img_1375-jpg.12143.jpg
    502.4 KB · Views: 246
  • upload_2016-11-24_21-22-51-png.12122.png
    upload_2016-11-24_21-22-51-png.12122.png
    1.1 MB · Views: 289
  • img_1375-jpg.12143.jpg
    img_1375-jpg.12143.jpg
    502.4 KB · Views: 244
  • img_1373-jpg.12144.jpg
    img_1373-jpg.12144.jpg
    312.1 KB · Views: 256
  • upload_2016-11-24_21-22-51-png.12122.png
    upload_2016-11-24_21-22-51-png.12122.png
    1.1 MB · Views: 294
  • img_1373-jpg.12144.jpg
    img_1373-jpg.12144.jpg
    312.1 KB · Views: 258
  • img_1375-jpg.12143.jpg
    img_1375-jpg.12143.jpg
    502.4 KB · Views: 243
  • img_1373-jpg.12144.jpg
    img_1373-jpg.12144.jpg
    312.1 KB · Views: 249
  • img_1375-jpg.12143.jpg
    img_1375-jpg.12143.jpg
    502.4 KB · Views: 269
  • img_1375-jpg.12143.jpg
    img_1375-jpg.12143.jpg
    502.4 KB · Views: 255
Last edited:
All critique welcome - Hit me HARD

except not level at edges of tank - can work on that when happy with rest

upload_2016-12-3_16-4-15-png.12180.png
upload_2016-12-3_16-5-31-png.12181.png
upload_2016-12-3_16-14-45-png.12182.png
upload_2016-12-3_16-15-18-png.12183.png
upload_2016-12-3_16-15-50-png.12184.png
upload_2016-12-3_16-16-22-png.12185.png
upload_2016-12-3_16-16-55-png.12186.png
upload_2016-12-3_16-17-26-png.12187.png
upload_2016-12-3_16-18-21-png.12188.png
upload_2016-12-3_16-18-53-png.12189.png

Sorry about the poor quality of the pics, working on my camera skills, even listen to the one podcast I had to listen to -Photography :whistle:
 

Attachments

  • upload_2016-12-3_16-16-22-png.12185.png
    upload_2016-12-3_16-16-22-png.12185.png
    2.6 MB · Views: 289
  • upload_2016-12-3_16-16-22-png.12185.png
    upload_2016-12-3_16-16-22-png.12185.png
    2.6 MB · Views: 268
  • upload_2016-12-3_16-16-55-png.12186.png
    upload_2016-12-3_16-16-55-png.12186.png
    2.1 MB · Views: 261
  • upload_2016-12-3_16-16-55-png.12186.png
    upload_2016-12-3_16-16-55-png.12186.png
    2.1 MB · Views: 261
  • upload_2016-12-3_16-17-26-png.12187.png
    upload_2016-12-3_16-17-26-png.12187.png
    2 MB · Views: 256
  • upload_2016-12-3_16-18-21-png.12188.png
    upload_2016-12-3_16-18-21-png.12188.png
    1.1 MB · Views: 278
  • upload_2016-12-3_16-17-26-png.12187.png
    upload_2016-12-3_16-17-26-png.12187.png
    2 MB · Views: 276
  • upload_2016-12-3_16-18-21-png.12188.png
    upload_2016-12-3_16-18-21-png.12188.png
    1.1 MB · Views: 279
  • upload_2016-12-3_16-18-53-png.12189.png
    upload_2016-12-3_16-18-53-png.12189.png
    1.9 MB · Views: 275
  • upload_2016-12-3_16-18-53-png.12189.png
    upload_2016-12-3_16-18-53-png.12189.png
    1.9 MB · Views: 266
Wasnt happy

So Two Piles - got wife involved :love:
upload_2016-12-7_22-53-23-png.12203.png
upload_2016-12-7_22-54-2-png.12204.png
upload_2016-12-7_22-55-13-png.12205.png
upload_2016-12-7_22-55-55-png.12206.png
upload_2016-12-7_22-56-44-png.12207.png
upload_2016-12-7_22-57-24-png.12208.png
upload_2016-12-7_22-59-43-png.12210.png

Substrate not level yet OFC will be same level all way round, plus not enough substrate in smaller pile (Fire pit), need to add some retainer walls with J Finleys plastic sheet (already got)

Two end peices (shallow end of triangle)of DW are not fixed, so can be moved/tuned

Middle area a lot more interesting IMO - could add sand/gravel path in long run

Sorry about poor quality pics 🙄
 

Attachments

  • upload_2016-12-7_22-55-13-png.12205.png
    upload_2016-12-7_22-55-13-png.12205.png
    1.5 MB · Views: 239
  • upload_2016-12-7_22-55-55-png.12206.png
    upload_2016-12-7_22-55-55-png.12206.png
    1.1 MB · Views: 253
  • upload_2016-12-7_22-56-44-png.12207.png
    upload_2016-12-7_22-56-44-png.12207.png
    1.8 MB · Views: 261
  • upload_2016-12-7_22-57-24-png.12208.png
    upload_2016-12-7_22-57-24-png.12208.png
    1.7 MB · Views: 251
Looks good, I am happy with any hardscape placement people do and when the plants are in will look completely different.

Couple of quick things...

I see you have bare copper pipes present in you light stands. These will quickly tarnish in presence of tank water splashes, as tank water is generally slightly acidic, especially if with CO2. Also might/will deposit copper salts into the water, not good for shrimp.

Make sure you can lift and or get access under the wood for (weekly) vacuuming. One of my hardscape a placements had a rock leaning on a piece of wood with Anubias growing it, looked like a branch growing out from under the rock. However all the tank detritus each week decided to collect under the exposed piece of wood and cleaning / vacuuming was hard. I had to move the rock, lift the wood each week disturbing the substrate and plants. I the end I used a smaller piece that wasn't under a rock and cleaning became much easier.
 
Very nice! Are you happy with it?

No- not yet :arghh: just trying different ideas, and giving wife a chance :nailbiting:

Looks good, I am happy with any hardscape placement people do and when the plants are in will look completely different.

Couple of quick things...

I see you have bare copper pipes present in you light stands. These will quickly tarnish in presence of tank water splashes, as tank water is generally slightly acidic, especially if with CO2. Also might/will deposit copper salts into the water, not good for shrimp.

Make sure you can lift and or get access under the wood for (weekly) vacuuming. One of my hardscape a placements had a rock leaning on a piece of wood with Anubias growing it, looked like a branch growing out from under the rock. However all the tank detritus each week decided to collect under the exposed piece of wood and cleaning / vacuuming was hard. I had to move the rock, lift the wood each week disturbing the substrate and plants. I the end I used a smaller piece that wasn't under a rock and cleaning became much easier.

Copper stand temporary - will be SS :thumbup: yet to decide if 4 lights enough :drowning:

Good tip on wood :thumbup:
 
How are you proposing to getting decent flow all over the tank ? Location of spray bars ?
 
How are you proposing to getting decent flow all over the tank ? Location of spray bars ?
upload_2016-12-7_22-56-44-png-12207-png.95489.png

yes spray bars

the one you can see will be aiming down, and other 'yet to be done' will be on wall side going parallel with surface, so So both should work well together and give a good clockwise flow in the pic

edit - its the flow thats making me think about the hardscape setup ATM
 
the one you can see will be aiming down, and other 'yet to be done' will be on wall side going parallel with surface, so So both should work well together and give a good clockwise flow in the pic
Hmmm. Not seen many people successfully keep algae free and healthy plants with spray bars on the shorter sides of the tank, rather than longer sides, especially in bigger tanks. If spray bar is pointing down I would be very surprised your substrate stays in place (considering the filters you have) as if I angle my spray bar down, even the slightest bit (say accidentally after cleaning), the substrate starts being wafted away. I of course await your experience to be proved wrong.

Unless you are going for something like this monster...(only £150, a bargain considering the volume it shifts).
http://www.advancedaquarist.com/2015/1/aafeature

😱😱😱

Custom/DIY spray bar, angle adjustable, so can have as many small large holes as I like. Going DSM which should help. can always have double pipes on wall side, Noob so well out of depth :nailbiting: but will find out 😉
 
Back
Top