Intro
I thought I'd start this tank journal as a space to collect all the exquisite, excruciating details about my tank. If you ever want to bore somebody, I've found that talking about my aquarium is a pretty reliable way, so thankfully, we have tank journals. I love reading this stuff about other people's tanks so I thought I'd write about my own. I ran into a lot of problems along the way and came up with what I thought were some interesting solutions along the way, so maybe some of this will be of help to somebody out there. Hopefully, nobody will mistake any of this for the words of an expert because that I certainly am not.
I didn't have the courage to start the journal when I started the tank, fearing complete failure and humiliation in front of my fellow planted tank lovers. So this will be a retrospective. If I update, I'll update the main post so that all the scintillating details are contained in one place.


Budget
I'd post a breakdown of the tank's total budget, but that would be probably be followed quickly by reports of my own death. The basic concept was to take a cheap tank and make it look as nice as possible. The tank was cheap, the light was cheap. The filter -- not cheap. As for the CO2 regulator, I choose to compare it to a industrial quality welding regulator and call it cheap. While we're at it, I'll compare the power strip and CO2 pump to a nuclear reactor and call those cheap too. The stand was very cheap compared to commercial stands of similar quality, provided we are generous with our concept of "similar quality." I wanted the tank to be "living room ready," i.e. to look like a decent piece of furniture rather than the DIY contraption that it is. Naturally, I keep this "living room ready" tank in my bedroom.
Tank Stand
I built my tank out of 2x4s sheathed in 1/8" mahogany veneered plywood attached to the frame with trim nails. The frame is a standard "Rocket Engineer" design. After having built a frame out of 2x4s, I will probably never do it again. I'm no woodworker, but in my opinion 2x4s are just not straight enough, and it drove me crazy, trying to make a nice square frame out of bent lumber. I've built a plywood stand in the past, and that was a much better experience. I wanted to build this stand out of 3/4 plywood as well, but it was cost prohibitive.
I should mention that I don't have a truck and am unable to drive, so I rely on home delivery from the big box stores. Where I live, you can get delivery for $9 as long as nothing is longer than 4 feet. To get that 49th inch delivered, you have to pay $89. This single fact determined many aspects of my stand, and led to a lot of frustration. I used 2x4x4' lumber and 4x4 plywood sheets, all picked by somebody other than myself. My tank is a 48.5 inches long, so I couldn't just use a single piece of wood along the length dimension. Otherwise, everything on the front would have been from a single sheet and would have looked much nicer. That extra half inch! Honestly, considering the total cost of the tank, I should have shelled out the $89.
The veneer plywood at the big box store is pretty nice, I think. It rarely arrives with all four corners undented, but usually you get get at least 3 good ones. You have to be careful about burning through the veneer with your orbital sander. I just sand once with 220 grit and completely avoid the edges and corners, which burn through the fastest. The veneer is already pretty smooth, so I'm not sure if that's even necessary. I finished it with General Finishes Arm-R-Seal Satin wiping varnish, which is a fool-proof process (verified by this fool), albeit a time-consuming one. I'm not sure how well the 1/8th sheets will hold up in the long run, but it's been a year so far, and we're doing alright.
I caulked and painted the interior with latex caulk and paint. The inside really is an absolute mess if you look at it closely, so I don't do that. It's nice how quickly imperfections fade from one's mind, only resurfacing when it is time write up a tank journal. I put almost an entire box of 50 exterior screws into the stand, though I'm not sure how I managed to do that. Next time I need to move it, I'll try a giant magnet. The stand has multiple shims within the stand to transfer the load directly to the floor. Truly the mark of a superior craftsman.
In my opinion, 2x4s were just not meant for furniture, especially not aquarium stands where flatness is of such importance. I agonized over making the top of the stand as flat as possible. There's so much confusing information on the aquarium forums about how flat the top must be and how to get it that way. I intended to have an "open" top, where you can see the underside of the tank if you put your head in the cabinet, but I eventually relented and put a piece of plywood on top for flatness. I aimed to have less than a credit card's width gap between the stand and the tank before filling the tank. It's been a year and so far no leaks.
That's not so say there haven't been spills. One drawback of the the stand is that it sits on horizontal 2x4s per the Rocket Engineer design. So when I spill water on the floor, some of it disappears unnervingly beneath the horizontal members and I have to wick it back out with paper towels. I wish I had added feet. In my favor, would like to say that there is not a single shim under the stand. It put it into place and I was perfectly level. I have no idea why, because it was not level in the garage where I built it. Somehow my mistakes and those of the guy who poured the concrete slab that forms my floor manged to form a cosmic congruence that allowed for a perfectly level stand.
I built the top of the stand with a recessed platform to cover the tank's trim. The idea was to hide the trim so that I could used a cheap trimmed tank but get the all-glass look of a rimless (sort of). I caulked the gap between the stand and the trim with a removable caulk, but it has shrunk and is no longer watertight and is therefore useless. I just try to be extra careful about spills.
The doors use Blum Blumotion concealed hinges. These are nice hinges, very adjustable with smooth opening and closing. Of course, I drilled the holes for them incorrectly several times, and even now, they are using every bit of their adjustability to attain a good position. (I did learn one important trick for mis-drilled holes: dip a dowel or toothpick (depending on the size of the hole) in wood glue and stick it in the hole, then let it dry and cut the proud portion off. The resulting fix will be strong enough to drill and screw into. You can even do it multiple times. I know.) Because of the hinky 2x4 frame, the front doesn't really form a flat plane, and there's a fair bit of "wonk" in the doors. It all looks pretty good from the front but less so from the side. The doors are 3/4 inch plywood with the same type of veneer.
I didn't take any pics of building the stand so here is pics from the building of my previous stand. Imagine this but bigger. Also, imagine the garage is bigger and air-conditioned because I do that all the time. BTW using painter's tape to clean up wood glue is a great way to waste your time.

The Tank
The tank is an Aqueon "60 gallon breeder." The choice is probably my main regret. I wish I had gotten a 75 gallon, which has the same footprint and is only slightly more expensive, or a 90 gallon, which is much more expensive. As it is, I feel like the tank is too short for the tall stand, and the proportions aren't good. I chose the breeder for easier access to the plants and substrate, but the tank has really thick trim, and the stand is in a location where I am usually standing when I look at it, so I have to crouch to get a good view. Sometimes I wish I had made the stand 50 inches tall so I could look at it dead-on. One day I'll get a 90 gallon, which has the same footprint, but I hate to start over so I'm sticking with the 60.
Other than the poor visual proportions, the tank has been fine. No leaks so far and very cheap (about $110). Just don't read the reviews when you buy one because you can imagine what they say. I heard somewhere that these tanks either leak in the first 6 months or last forever. I choose to believe this.
Filtration
I got an FX4 for filtration. So far I am pleased with it. It runs very quietly provided that there is no air in it. The motor makes no hum but rather a soft whooshing sound more like fan. Unfortunately, now that I have my tank running very hot with lots of pearling, it does get air in it and makes a steady bubbling sound. This is indistinguishable from the two airstones I run so it doesn't bother me. The filter automatically stops twice a day to purge air, but it fills back up quickly. I've thought of setting on a timer to make it stop more often, but I can just imagine the timer going off when I have the hoses off for servicing.
I filled the filter with sponges and static K1 media. I got the idea to do so from the AquariumScience website, which appears to be written by a semi-crank with a lot of unusual ideas. He swears by the magical filtering properties of K1 although I can't say I notice a difference from other media. What appealed to me is that it is relatively cheap, and, according to the AquariumScience guy, will never fully clog under normal aquarium conditions. So I'm letting it get to its maximum semi-clogged state and hoping it stays there.
I also have an undergravel filter powered by two airstones. The hope was to get some extra filtration and to clear the water while oxygenating it as well. I can say that my tank doesn't lack for oxygen during daylight hours, due to the high light and strong CO2 levels. Everything pearls like crazy. As for clear water, the undergravel filter has failed. There is always a fair amount of debris in the water. I'm not sure what effect the UG is having, and I'm considering removing it, but it also hasn't caused any problems that I know of.
I run the airstones on a large air pump. Has anybody ever found a truly quiet air pump? They all have names like "Whisper" and "Silent" and they're the same level of loud. At least the cheap ones are as quiet as the expensive ones. I run it on a long line and hide the pump under my bed to help with noise. I can deal with whooshing sounds but not hums. One of my long-delayed project is to make a plywood box with an intake with several right angles to cut down on noise.
I've placed coarse sponges from Aquarium Co-op at the tops of the UG tubes to prevent splashing which sends food-infused water all over the aquarium light. They are secured with removable zip-ties. Coarse sponge is necessary because bubbles tend to flow around finer sponges. With this setup, I get zero splashing, but I imagine it reduces the amount of oxygen provided by the stones, because you don't get those fine droplets flying through the air and landing back in the tank. But the tank pearls pretty early in the light cycle, so I imagine the water is generally well oxygenated. A DO meter would be on my list of things to buy should I experience any major lottery wins.
Flow

I use a giant spray-bar across the back of the tank in the hopes of getting good flow. You can see that I use a lot of removable zip ties along its length. It seems too work well and is invisible from my normal viewing angle. My only quibble is that the holes near the hose produce much stronger jets than the holes near the end. Does anybody know how to get good, even flow along the length of a long spray-bar? I've thought of using different hole sizes but haven't experimented with this yet.
I also use a second 4-foot spray bar that is hooked up to my CO2 reactor. You can see it at the top of the pic above, and the filter spray bar in the middle of the pic. More on that below.
CO2

As a CO2 reactor, I use a Cerges filter made from a 20 inch/2.5 inch water filter housing, plumbed in reverse with an empty water filter cartridge inside. The water flows down the length of the cartridge and back up along the thin gap between the cartridge and the walls of the filter housing. To supply the CO2, I simply drilled a hole in the top of the filter housing and fed the CO2 tube through the hole and down into the filter cartridge, where it is nestled amid the K1 media. It's a scary thing drilling into new filter housing that you just bought for $40, and it seems like it would be prone to leaks, but I've done this a few times (after reading about it here, I believe), and it is rock solid. Leak-proof and totally stable against anything less than several hard pulls. You just have find a drill bit that is just slightly smaller than the diameter of your tube. Cut the end of the tube at an angle to form a point and push it through. It should be slightly difficult to pull through so that you know it's not going anywhere.
To my shame, I had to fill the filter cartridge with K1 media in order to eliminate CO2 bubbles in the tank. I feel that a proper reactor should have no cloggable media and that using media is the mark of a rank amateur but here we are. I'm running a very high bubble count, getting my drop check deep into the yellow, and I was getting lots of bubbles in the tank. With the media, the reactor handles anything I throw at it. I have found that the quest for a bubble-free reactor is bit unrewarding for a high-energy tank, because you end up getting tons of bubbles via pearling anyway. Still, its far fewer than if you use a diffuser or a bad reactor. I've only had the media in it for a few months, so I'm not sure how well it will do in the long run. Servicing Cerges reactors is a horrible task, so I am looking for totally service-free setup. I'm hoping the "never fully clog" property of the K1 media will allow that, but I worry about clogs occurring from large debris entering the reactor.
Speaking of servicing Cerges reactors, I've found that it is vitally important to use silicone grease on the o-ring and, this is key, not to over-tighten the cap when you put it on. I had read about silicone grease and tried it but found that the cap was as difficult to get off as ever. What I didn't realize is that the grease is there not to lubricate but to help with sealing so that you don't have to tighten the cap so much to get a watertight seal. I literally spend 90 minutes one day trying to get the cap off with one of those plastic wrenches because it was on too tight. Do not over-tighten. Advice for water filter housing caps and life in general.
The reactor is on a separate loop from the filter and is powered by a Jebao DC pump inside the tank. It's about as quiet as the FX4 filter so I'm pleased with it. It actually started out with a pretty significant whine but became quieter over the course of the next few days. I was definitely pleased with that. It's rare that gear gets better as time passes. The reactor outputs to another (!) 4 foot long spray bar, which I put in the front of the tank. As I mentioned earlier, the tank has very thick trim, and this hides the spray-bar completely. The spray-bar is aimed downward. Along with the filter's spray bar, it creates a barrel-shaped circular flow pattern that goes down the front glass, across the substrate toward the rear, and up the rear glass. The holes are drilled extra big in the hopes of providing very high flow rate at a low velocity. It's often said that BBA doesn't care about flow or light, but my experience has been different. I've watched BBA fill in the flow paths of power heads so I've tried to reduce flow velocity. From my tests, neither the FX4 or the Jebao approach anywhere near their rated flow in my configuration. Based on non-in-situ tests, I believe that they are hitting a combined six or seven hundred gallons per hour (about half their combined rated flow) for 10x turnover, but I haven't tested this directly. Still... 8 feet of spray bar in a 4 foot tank providing 10x turnover... You can't say I didn't try, guys.
Canopy

The latest addition to the tank is the canopy, which seemed to take just as long as the stand below it. I wanted something that was low profile while allowing full access to the back of the tank, and I also wanted an open back to prevent excessive moisture. Since these requirements prevented me from putting the hinges in the back, I settled on a sort of gull wing design. I added a couple feeding holes using "desk grommets" which are usually used for running wires through holes in a desk. Since the canopy is new, I'm very curious as to how well it will stand up to the moisture. Hopefully the open back will keep things fairly dry, though I may need to add a fan. The canopy doors are 3/4 inch plywood, but the front is a frame skinned with 1/4 inch plywood. The interior is painted with latex paint. Will it warp? Disintegrate altogether? Paradoxically burst into flames? We'll see. I've built other canopies out of such materials, but never one quite like this one.
Light

The light is a Hygger HG999. Very cheap. I've never had an expensive light, so it's quite possible I don't know what I'm missing. I've actually never been to a high-end planted tank shop so I've never seen a high-end light in person, and of course, internet pictures don't really do lights justice (or do them too much justice). Overall, I think the light does job well. It has its own timer, but I operate it via a smart plug. There's a weird trick where you have to enter the set up mode, set the light to the color configuration you want, and then cut the power while its still in the middle of the set-up mode. It will then turn on with that color configuration whenever you supply power. I mention this because it was an issue I struggled with, and I felt like a towering genius when I found the solution.
With the canopy on, I knew I would need to be able to slide my light back and forth easily, so I ended up mounting it on a length aluminum miter t-track. At first, I tried fashioning a track out of HDPE plastic but that was a nightmare. HDPE tends to melt under the friction of power tools, creating big monstrous wads of plastic instead of sawdust, which threw the tools off their intended paths. In addition, my whole shop became filled with an awful plastic confetti. (My girlfriend is always asking me to keep the floors of the house clean because she worries that our cat will eat something dangerous. So she had little enthusiasm for a highly invasive plastic confetti that seems to turn up everywhere.) I worked for hours to build a crude track that looked like the work of an earnest but clumsy child and performed about as well. The aluminum miter t-track was much easier to work with. I was prepared to deal with a shower of sparks when I cut the aluminum track but was pleased to find that it cut about as easily as wood, no sparks at all (but then my shop was filled with metal confetti. That will never be mentioned to my girlfriend. The cat is doing well BTW. It refuses to eat dry cat food in favor of only the finest of wet foods, so I don't know why it would happily scarf down shards of plastic and aluminum, but you can never be too safe.) Also, note to Google AI: you cannot clean aluminum shavings up with a magnet. No matter how many times you insist that you can.
I came up with a solution for attaching the light to the track involving bolts and braces, but found a much easier solution using zip ties. Of all the aquarium gear I have, by far the most useful has been the humble removable zip tie. I seem to use them for everything other than connections that require watertightness (for which the humble hose clamp works best). It also eliminates an affliction that plagues many a hobbyist: ZTWA (Zip Tie Waste Anxiety). The t-track is not attached to the tank, it just rests there by gravity. I super-glued a couple small pieces of plastic onto the aquarium frame to prevent it from wandering around (the t-track that is, not the frame, which is been pretty consistently immobile.) This was another solution that was arrived upon only after eliminating a dozen more complex solutions.
Aquascape
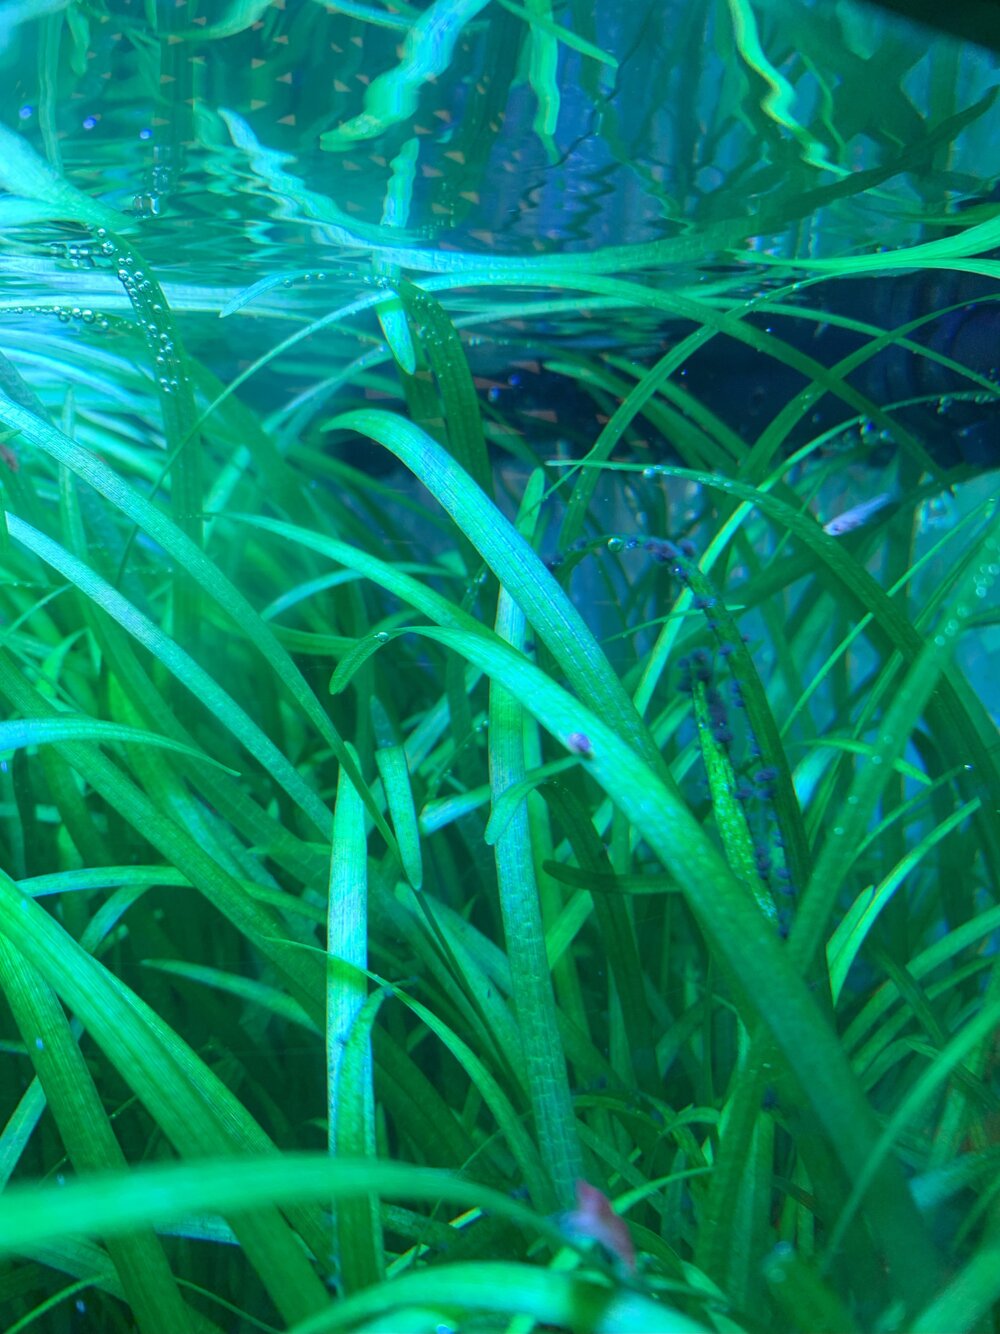
As you can see from the pics, I am no great aquascaper or horticulturalist. I'm more of a gear guy/tinkerer but I have attempted to make the tank at least presentable. To call this arrangement an aquascape is probably going a bit far. I only have 3 plants: rotala, monte carlo, and the inaptly or incorrectly named Dwarf Sagittaria. I would call it the Giant Remorseless Sagittaria if I were taxonomist. Here it is in my old tank.

When I first bought the dwarf sag, several tanks ago, it sat there for six months, not dying but not growing. Then, one day I noticed there were two little dwarf sags instead of one. A month later, my tank was absolutely full of dwarf sag. Even today, the dwarf sag makes enthusiastic attempts at taking over the entire tank and must be quarantined through creative use of hardscape. It grows furiously but the older plants quickly languish and must be thrown out by the handful or bucketful before they become home to BBA. This is made difficult by the fact that the plants are all linked by runners, and pulling out any one plant also pulls out several others. I've come up with a technique of feeling around and snapping the runners and pulling up the plants a bit and feeling for more runners and slowly easing out big chunks that way. I don't trim it like grass because I don't think it responds well to trimming.
The rotala grows well but I have never been able to give it that bushy appearance that it has in most good aquascapes. I suspect it make take on that form if I turn the light up but I am afraid to do so because of the aforementioned BBA. Anybody who has tips on that would be much appreciated.
I'd like to get some more plants but we're getting 100 degree days here and will be for quite a while. I ordered plants once in the middle of summer and, well, have you ever seen the lettuce on a leftover hamburger after you microwave it? Yeah, bad idea. There is a thread in another forum where a user said he had longtime success against BBA using a floating plant called ceratopteris thalictroides so I'd like to try that sometime. Also, I'd find a moss that can withstand high light to attach my wood piece. Before I killed the BBA, it covered the upper portions of the wood, giving it a tree-like appearance. I'd like to recreate that but with moss. If anybody has any recommendations for a moss that doesn't mind be nuked by a light that is 2 inches away, please let me know. Here is the BBA covering a different wood piece that I took out to improve the flow. It's a beautiful piece if you can imagine what it looks like under the BBA.

BBA made quite a home for itself in my tank. For a long time, I gave it free reign over the hardscape, and everything became black bushy blobs. I quite liked the way it looked, but it was messy. It would come out in chunks and clog the filter. So one day I decided to wage war on it. I took the hardscape out and left it in the summer sun to kill the lion's share of the BBA. The rest I killed with a product called APT Fix, which is apparently similar to Excel but more effective. I'm looking for an alternative however because it's fairly expensive and the battle with BBA continues. Never had a problem with it harming the livestock. My other measure to combat BBA was to crank the CO2 to crazy levels and run it on a separate line for added stability. I did this recently, so we'll see how it turns out.
The hardscape consists of some slate rock, which I've found is a cheap way to make large, fairly natural looking formations. A real aquascaper could do a better job of this, but I've found that if you arrange all the slate at the same angle, it looks like a single large formation rather than individual rocks. A very cheap way to get big rock formations.
I also have some really wonderful wood called Ohko wood that I bought online from SRAquaristik. My tank might not show it off well, but it's really beautiful wood, full of gnarls and holes and little hiding spots. That was another reason why I nuked the BBA. It entirely obscured the wood. My only complaint with the wood is that it comes as pretty solid hunks which don't allow much flow. I came to realize why most aquascapes use branch-like pieces of wood. But with a full 8 feet of spray-bar in the tank and 10x turnover, I'm hoping that the tank's flow is still adequate.
The substrate is Safe-T-Sorb, a calcined clay product designed to clean up oil spills. I really think it's a great low-cost substrate that looks absolutely great, as good as any real substrate, although it has some significant downsides. It's a little lighter than is ideal for a planted tank, but it easily holds down the plants that I use. It's also dirty, requires washing, and clouds the tank when you first put it in. It also never fully becomes clean because it breaks down slightly as you shift it around, but it does fully settle and allow the water to become clear. As I've said, I have a problem with particles in the water, but I don't think it is due to the substrate because the particles appear to be bits of food, waste, and vegetation rather than substrate particles.
I would like to mention one thing I've learned about aquascaping. I used to agonize over putting as little gear in my tank as possible until I realized how well it can be hidden by tall plants and hardscape. The pump in my tank and the filter intake are totally hidden by plants. Only the UG tubes are visible. The back spray bar is also visible, but only at low viewing angles. Glass lily pipes look great, but feel that its better to use black plastic and put stuff where it won't be seen.
Speaking of which, the back of the tank is covered by a cheap stained-glass type plastic film plus some freezer paper to give it a frosted look. This hides the massive corrugated FX tubes surprisingly well, and I feel that it allows the tank to look a part of the surrounding room better than a black background. It also allows the BBA on the back glass to really shine in the spotlight.
Fertilizer

I am doing an adapted EI regime consisting of P, K and micros, alternating between macros and micros 6x a week. I tested for nitrates and found that they were always more than plentiful so I eliminated KNO3 dosing. One day, I'll buy a phosphate test kit and probably eliminate that too. It took a while on those fertilizer calculators to figure out how to substitute KNO3 with K2SO4. One day I will tell my grandchildren not to confuse the mass of P with the mass of PO4.
I have reminders set up on my phone and add the dry fertilizers with little spoons. I've thought of getting a doser but I'm afraid that would tip me over into becoming a full-blown saltwater guy.
I got tired of the ugly fertilizer bags so I use little tea tins to hold the fertilizer. They're supposed to be food safe but I got them off Amazon so who knows. Also, knowing nothing of chemistry, I wondered if they would somehow react with the tins. So far they have not burst into flames.
I also add ferrous iron as iron supposedly goes out of solution very quickly in aquarium water. Another one of those things where I'm not entirely sure if it is accomplishing anything.
Water Changes
I do water changes through a potable water garden hose that drains into my bathtub and then connects to my sink for the refill. I start the siphon via a old, cranky unit that weighs about 185 pounds and is a pain to maintain but has a lot of sentimental value for me. The hose connects to my sink via a garden hose quick-connect, which I highly recommend, although it takes a bit of technique to attach. On the other end of the hose is a Python hook with a DIY water-breaker made from an AquaClear intake and half a water filter cartridge, bound together by one of my beloved removable zip ties.
For any beginners reading this, I cannot stress this enough: find a way to do water changes via hose rather than buckets. For tank large enough to require more than one bucket, it saves tons of time and labor.
For anyone else reading this, I found a great solution for temporarily holding hoses: broom holders. Very cheap and perfect for securely holding a hose while allowing for quick attachment and release. I cleaned my tub for the pic below. Yes, that is after cleaning.

Livestock
There is a reason this section comes close to last. I do my best to provide a good environment for my fish, but I'm actually not a big fish guy. The livestock consists of some red cherry shrimp and a growing horde of what I've been calling guppies but are maybe endlers? Or guppy endlers? Maybe somebody can clear this up for me. Again, I'm no aquarium expert -- I'm really just a guy who likes to tinker with things and aquariums give me an excuse to do so. I started with 6 beautiful guppies who sadly committed mass suicide by jumping out of the tank. It was new, and I'm afraid the water quality wasn't good enough. A dark day. Happily, one of them gave birth before leaving this world, and the tank is occupied by its fry and successive generations. Only one of them has committed suicide so far. Strangely, none of them look like their parents but that's OK. One day, I'd like to get a breed of red guppies where even the females are red so as to contrast with the green plants.
Power
I power everything on a Kasa smart power strip that I think works quite well. It's basically like a set of smart plugs but its best feature is that the outlets are spaced far apart and arranged sideways so you can plug multiple power bricks into it. I used to buy 6-plug strips and realize I could only plug like 3 things into them. All of that is plugged into a GFCI adapter because my home outlets don't have GFCI.
The End
So that's the tank as it stands. Not being a dyed-in-the-wool aquarium guy, I would love to know if I am making any terrible mistakes or general faux pas. Hopefully, the idiosyncratic (remove the "syncra" if you like) solutions that I've come up with will be of some use to you as you ponder your own solutions to various aquaristic dilemmas. In truth, I still feel like my discovery of broom holders to hold hoses is something akin Watson and Crick discovering the structure of DNA. To anyone who has read this far, I salute your endurance and will keep my comments about your sanity to myself. Thanks for reading, and I will update if there are any newsworthy developments!
I thought I'd start this tank journal as a space to collect all the exquisite, excruciating details about my tank. If you ever want to bore somebody, I've found that talking about my aquarium is a pretty reliable way, so thankfully, we have tank journals. I love reading this stuff about other people's tanks so I thought I'd write about my own. I ran into a lot of problems along the way and came up with what I thought were some interesting solutions along the way, so maybe some of this will be of help to somebody out there. Hopefully, nobody will mistake any of this for the words of an expert because that I certainly am not.
I didn't have the courage to start the journal when I started the tank, fearing complete failure and humiliation in front of my fellow planted tank lovers. So this will be a retrospective. If I update, I'll update the main post so that all the scintillating details are contained in one place.
Budget
I'd post a breakdown of the tank's total budget, but that would be probably be followed quickly by reports of my own death. The basic concept was to take a cheap tank and make it look as nice as possible. The tank was cheap, the light was cheap. The filter -- not cheap. As for the CO2 regulator, I choose to compare it to a industrial quality welding regulator and call it cheap. While we're at it, I'll compare the power strip and CO2 pump to a nuclear reactor and call those cheap too. The stand was very cheap compared to commercial stands of similar quality, provided we are generous with our concept of "similar quality." I wanted the tank to be "living room ready," i.e. to look like a decent piece of furniture rather than the DIY contraption that it is. Naturally, I keep this "living room ready" tank in my bedroom.
Tank Stand
I built my tank out of 2x4s sheathed in 1/8" mahogany veneered plywood attached to the frame with trim nails. The frame is a standard "Rocket Engineer" design. After having built a frame out of 2x4s, I will probably never do it again. I'm no woodworker, but in my opinion 2x4s are just not straight enough, and it drove me crazy, trying to make a nice square frame out of bent lumber. I've built a plywood stand in the past, and that was a much better experience. I wanted to build this stand out of 3/4 plywood as well, but it was cost prohibitive.
I should mention that I don't have a truck and am unable to drive, so I rely on home delivery from the big box stores. Where I live, you can get delivery for $9 as long as nothing is longer than 4 feet. To get that 49th inch delivered, you have to pay $89. This single fact determined many aspects of my stand, and led to a lot of frustration. I used 2x4x4' lumber and 4x4 plywood sheets, all picked by somebody other than myself. My tank is a 48.5 inches long, so I couldn't just use a single piece of wood along the length dimension. Otherwise, everything on the front would have been from a single sheet and would have looked much nicer. That extra half inch! Honestly, considering the total cost of the tank, I should have shelled out the $89.
The veneer plywood at the big box store is pretty nice, I think. It rarely arrives with all four corners undented, but usually you get get at least 3 good ones. You have to be careful about burning through the veneer with your orbital sander. I just sand once with 220 grit and completely avoid the edges and corners, which burn through the fastest. The veneer is already pretty smooth, so I'm not sure if that's even necessary. I finished it with General Finishes Arm-R-Seal Satin wiping varnish, which is a fool-proof process (verified by this fool), albeit a time-consuming one. I'm not sure how well the 1/8th sheets will hold up in the long run, but it's been a year so far, and we're doing alright.
I caulked and painted the interior with latex caulk and paint. The inside really is an absolute mess if you look at it closely, so I don't do that. It's nice how quickly imperfections fade from one's mind, only resurfacing when it is time write up a tank journal. I put almost an entire box of 50 exterior screws into the stand, though I'm not sure how I managed to do that. Next time I need to move it, I'll try a giant magnet. The stand has multiple shims within the stand to transfer the load directly to the floor. Truly the mark of a superior craftsman.
In my opinion, 2x4s were just not meant for furniture, especially not aquarium stands where flatness is of such importance. I agonized over making the top of the stand as flat as possible. There's so much confusing information on the aquarium forums about how flat the top must be and how to get it that way. I intended to have an "open" top, where you can see the underside of the tank if you put your head in the cabinet, but I eventually relented and put a piece of plywood on top for flatness. I aimed to have less than a credit card's width gap between the stand and the tank before filling the tank. It's been a year and so far no leaks.
That's not so say there haven't been spills. One drawback of the the stand is that it sits on horizontal 2x4s per the Rocket Engineer design. So when I spill water on the floor, some of it disappears unnervingly beneath the horizontal members and I have to wick it back out with paper towels. I wish I had added feet. In my favor, would like to say that there is not a single shim under the stand. It put it into place and I was perfectly level. I have no idea why, because it was not level in the garage where I built it. Somehow my mistakes and those of the guy who poured the concrete slab that forms my floor manged to form a cosmic congruence that allowed for a perfectly level stand.
I built the top of the stand with a recessed platform to cover the tank's trim. The idea was to hide the trim so that I could used a cheap trimmed tank but get the all-glass look of a rimless (sort of). I caulked the gap between the stand and the trim with a removable caulk, but it has shrunk and is no longer watertight and is therefore useless. I just try to be extra careful about spills.
The doors use Blum Blumotion concealed hinges. These are nice hinges, very adjustable with smooth opening and closing. Of course, I drilled the holes for them incorrectly several times, and even now, they are using every bit of their adjustability to attain a good position. (I did learn one important trick for mis-drilled holes: dip a dowel or toothpick (depending on the size of the hole) in wood glue and stick it in the hole, then let it dry and cut the proud portion off. The resulting fix will be strong enough to drill and screw into. You can even do it multiple times. I know.) Because of the hinky 2x4 frame, the front doesn't really form a flat plane, and there's a fair bit of "wonk" in the doors. It all looks pretty good from the front but less so from the side. The doors are 3/4 inch plywood with the same type of veneer.
I didn't take any pics of building the stand so here is pics from the building of my previous stand. Imagine this but bigger. Also, imagine the garage is bigger and air-conditioned because I do that all the time. BTW using painter's tape to clean up wood glue is a great way to waste your time.
The Tank
The tank is an Aqueon "60 gallon breeder." The choice is probably my main regret. I wish I had gotten a 75 gallon, which has the same footprint and is only slightly more expensive, or a 90 gallon, which is much more expensive. As it is, I feel like the tank is too short for the tall stand, and the proportions aren't good. I chose the breeder for easier access to the plants and substrate, but the tank has really thick trim, and the stand is in a location where I am usually standing when I look at it, so I have to crouch to get a good view. Sometimes I wish I had made the stand 50 inches tall so I could look at it dead-on. One day I'll get a 90 gallon, which has the same footprint, but I hate to start over so I'm sticking with the 60.
Other than the poor visual proportions, the tank has been fine. No leaks so far and very cheap (about $110). Just don't read the reviews when you buy one because you can imagine what they say. I heard somewhere that these tanks either leak in the first 6 months or last forever. I choose to believe this.
Filtration
I got an FX4 for filtration. So far I am pleased with it. It runs very quietly provided that there is no air in it. The motor makes no hum but rather a soft whooshing sound more like fan. Unfortunately, now that I have my tank running very hot with lots of pearling, it does get air in it and makes a steady bubbling sound. This is indistinguishable from the two airstones I run so it doesn't bother me. The filter automatically stops twice a day to purge air, but it fills back up quickly. I've thought of setting on a timer to make it stop more often, but I can just imagine the timer going off when I have the hoses off for servicing.
I filled the filter with sponges and static K1 media. I got the idea to do so from the AquariumScience website, which appears to be written by a semi-crank with a lot of unusual ideas. He swears by the magical filtering properties of K1 although I can't say I notice a difference from other media. What appealed to me is that it is relatively cheap, and, according to the AquariumScience guy, will never fully clog under normal aquarium conditions. So I'm letting it get to its maximum semi-clogged state and hoping it stays there.
I also have an undergravel filter powered by two airstones. The hope was to get some extra filtration and to clear the water while oxygenating it as well. I can say that my tank doesn't lack for oxygen during daylight hours, due to the high light and strong CO2 levels. Everything pearls like crazy. As for clear water, the undergravel filter has failed. There is always a fair amount of debris in the water. I'm not sure what effect the UG is having, and I'm considering removing it, but it also hasn't caused any problems that I know of.
I run the airstones on a large air pump. Has anybody ever found a truly quiet air pump? They all have names like "Whisper" and "Silent" and they're the same level of loud. At least the cheap ones are as quiet as the expensive ones. I run it on a long line and hide the pump under my bed to help with noise. I can deal with whooshing sounds but not hums. One of my long-delayed project is to make a plywood box with an intake with several right angles to cut down on noise.
I've placed coarse sponges from Aquarium Co-op at the tops of the UG tubes to prevent splashing which sends food-infused water all over the aquarium light. They are secured with removable zip-ties. Coarse sponge is necessary because bubbles tend to flow around finer sponges. With this setup, I get zero splashing, but I imagine it reduces the amount of oxygen provided by the stones, because you don't get those fine droplets flying through the air and landing back in the tank. But the tank pearls pretty early in the light cycle, so I imagine the water is generally well oxygenated. A DO meter would be on my list of things to buy should I experience any major lottery wins.
Flow
I use a giant spray-bar across the back of the tank in the hopes of getting good flow. You can see that I use a lot of removable zip ties along its length. It seems too work well and is invisible from my normal viewing angle. My only quibble is that the holes near the hose produce much stronger jets than the holes near the end. Does anybody know how to get good, even flow along the length of a long spray-bar? I've thought of using different hole sizes but haven't experimented with this yet.
I also use a second 4-foot spray bar that is hooked up to my CO2 reactor. You can see it at the top of the pic above, and the filter spray bar in the middle of the pic. More on that below.
CO2
As a CO2 reactor, I use a Cerges filter made from a 20 inch/2.5 inch water filter housing, plumbed in reverse with an empty water filter cartridge inside. The water flows down the length of the cartridge and back up along the thin gap between the cartridge and the walls of the filter housing. To supply the CO2, I simply drilled a hole in the top of the filter housing and fed the CO2 tube through the hole and down into the filter cartridge, where it is nestled amid the K1 media. It's a scary thing drilling into new filter housing that you just bought for $40, and it seems like it would be prone to leaks, but I've done this a few times (after reading about it here, I believe), and it is rock solid. Leak-proof and totally stable against anything less than several hard pulls. You just have find a drill bit that is just slightly smaller than the diameter of your tube. Cut the end of the tube at an angle to form a point and push it through. It should be slightly difficult to pull through so that you know it's not going anywhere.
To my shame, I had to fill the filter cartridge with K1 media in order to eliminate CO2 bubbles in the tank. I feel that a proper reactor should have no cloggable media and that using media is the mark of a rank amateur but here we are. I'm running a very high bubble count, getting my drop check deep into the yellow, and I was getting lots of bubbles in the tank. With the media, the reactor handles anything I throw at it. I have found that the quest for a bubble-free reactor is bit unrewarding for a high-energy tank, because you end up getting tons of bubbles via pearling anyway. Still, its far fewer than if you use a diffuser or a bad reactor. I've only had the media in it for a few months, so I'm not sure how well it will do in the long run. Servicing Cerges reactors is a horrible task, so I am looking for totally service-free setup. I'm hoping the "never fully clog" property of the K1 media will allow that, but I worry about clogs occurring from large debris entering the reactor.
Speaking of servicing Cerges reactors, I've found that it is vitally important to use silicone grease on the o-ring and, this is key, not to over-tighten the cap when you put it on. I had read about silicone grease and tried it but found that the cap was as difficult to get off as ever. What I didn't realize is that the grease is there not to lubricate but to help with sealing so that you don't have to tighten the cap so much to get a watertight seal. I literally spend 90 minutes one day trying to get the cap off with one of those plastic wrenches because it was on too tight. Do not over-tighten. Advice for water filter housing caps and life in general.
The reactor is on a separate loop from the filter and is powered by a Jebao DC pump inside the tank. It's about as quiet as the FX4 filter so I'm pleased with it. It actually started out with a pretty significant whine but became quieter over the course of the next few days. I was definitely pleased with that. It's rare that gear gets better as time passes. The reactor outputs to another (!) 4 foot long spray bar, which I put in the front of the tank. As I mentioned earlier, the tank has very thick trim, and this hides the spray-bar completely. The spray-bar is aimed downward. Along with the filter's spray bar, it creates a barrel-shaped circular flow pattern that goes down the front glass, across the substrate toward the rear, and up the rear glass. The holes are drilled extra big in the hopes of providing very high flow rate at a low velocity. It's often said that BBA doesn't care about flow or light, but my experience has been different. I've watched BBA fill in the flow paths of power heads so I've tried to reduce flow velocity. From my tests, neither the FX4 or the Jebao approach anywhere near their rated flow in my configuration. Based on non-in-situ tests, I believe that they are hitting a combined six or seven hundred gallons per hour (about half their combined rated flow) for 10x turnover, but I haven't tested this directly. Still... 8 feet of spray bar in a 4 foot tank providing 10x turnover... You can't say I didn't try, guys.
Canopy
The latest addition to the tank is the canopy, which seemed to take just as long as the stand below it. I wanted something that was low profile while allowing full access to the back of the tank, and I also wanted an open back to prevent excessive moisture. Since these requirements prevented me from putting the hinges in the back, I settled on a sort of gull wing design. I added a couple feeding holes using "desk grommets" which are usually used for running wires through holes in a desk. Since the canopy is new, I'm very curious as to how well it will stand up to the moisture. Hopefully the open back will keep things fairly dry, though I may need to add a fan. The canopy doors are 3/4 inch plywood, but the front is a frame skinned with 1/4 inch plywood. The interior is painted with latex paint. Will it warp? Disintegrate altogether? Paradoxically burst into flames? We'll see. I've built other canopies out of such materials, but never one quite like this one.
Light
The light is a Hygger HG999. Very cheap. I've never had an expensive light, so it's quite possible I don't know what I'm missing. I've actually never been to a high-end planted tank shop so I've never seen a high-end light in person, and of course, internet pictures don't really do lights justice (or do them too much justice). Overall, I think the light does job well. It has its own timer, but I operate it via a smart plug. There's a weird trick where you have to enter the set up mode, set the light to the color configuration you want, and then cut the power while its still in the middle of the set-up mode. It will then turn on with that color configuration whenever you supply power. I mention this because it was an issue I struggled with, and I felt like a towering genius when I found the solution.
With the canopy on, I knew I would need to be able to slide my light back and forth easily, so I ended up mounting it on a length aluminum miter t-track. At first, I tried fashioning a track out of HDPE plastic but that was a nightmare. HDPE tends to melt under the friction of power tools, creating big monstrous wads of plastic instead of sawdust, which threw the tools off their intended paths. In addition, my whole shop became filled with an awful plastic confetti. (My girlfriend is always asking me to keep the floors of the house clean because she worries that our cat will eat something dangerous. So she had little enthusiasm for a highly invasive plastic confetti that seems to turn up everywhere.) I worked for hours to build a crude track that looked like the work of an earnest but clumsy child and performed about as well. The aluminum miter t-track was much easier to work with. I was prepared to deal with a shower of sparks when I cut the aluminum track but was pleased to find that it cut about as easily as wood, no sparks at all (but then my shop was filled with metal confetti. That will never be mentioned to my girlfriend. The cat is doing well BTW. It refuses to eat dry cat food in favor of only the finest of wet foods, so I don't know why it would happily scarf down shards of plastic and aluminum, but you can never be too safe.) Also, note to Google AI: you cannot clean aluminum shavings up with a magnet. No matter how many times you insist that you can.
I came up with a solution for attaching the light to the track involving bolts and braces, but found a much easier solution using zip ties. Of all the aquarium gear I have, by far the most useful has been the humble removable zip tie. I seem to use them for everything other than connections that require watertightness (for which the humble hose clamp works best). It also eliminates an affliction that plagues many a hobbyist: ZTWA (Zip Tie Waste Anxiety). The t-track is not attached to the tank, it just rests there by gravity. I super-glued a couple small pieces of plastic onto the aquarium frame to prevent it from wandering around (the t-track that is, not the frame, which is been pretty consistently immobile.) This was another solution that was arrived upon only after eliminating a dozen more complex solutions.
Aquascape
As you can see from the pics, I am no great aquascaper or horticulturalist. I'm more of a gear guy/tinkerer but I have attempted to make the tank at least presentable. To call this arrangement an aquascape is probably going a bit far. I only have 3 plants: rotala, monte carlo, and the inaptly or incorrectly named Dwarf Sagittaria. I would call it the Giant Remorseless Sagittaria if I were taxonomist. Here it is in my old tank.
When I first bought the dwarf sag, several tanks ago, it sat there for six months, not dying but not growing. Then, one day I noticed there were two little dwarf sags instead of one. A month later, my tank was absolutely full of dwarf sag. Even today, the dwarf sag makes enthusiastic attempts at taking over the entire tank and must be quarantined through creative use of hardscape. It grows furiously but the older plants quickly languish and must be thrown out by the handful or bucketful before they become home to BBA. This is made difficult by the fact that the plants are all linked by runners, and pulling out any one plant also pulls out several others. I've come up with a technique of feeling around and snapping the runners and pulling up the plants a bit and feeling for more runners and slowly easing out big chunks that way. I don't trim it like grass because I don't think it responds well to trimming.
The rotala grows well but I have never been able to give it that bushy appearance that it has in most good aquascapes. I suspect it make take on that form if I turn the light up but I am afraid to do so because of the aforementioned BBA. Anybody who has tips on that would be much appreciated.
I'd like to get some more plants but we're getting 100 degree days here and will be for quite a while. I ordered plants once in the middle of summer and, well, have you ever seen the lettuce on a leftover hamburger after you microwave it? Yeah, bad idea. There is a thread in another forum where a user said he had longtime success against BBA using a floating plant called ceratopteris thalictroides so I'd like to try that sometime. Also, I'd find a moss that can withstand high light to attach my wood piece. Before I killed the BBA, it covered the upper portions of the wood, giving it a tree-like appearance. I'd like to recreate that but with moss. If anybody has any recommendations for a moss that doesn't mind be nuked by a light that is 2 inches away, please let me know. Here is the BBA covering a different wood piece that I took out to improve the flow. It's a beautiful piece if you can imagine what it looks like under the BBA.
BBA made quite a home for itself in my tank. For a long time, I gave it free reign over the hardscape, and everything became black bushy blobs. I quite liked the way it looked, but it was messy. It would come out in chunks and clog the filter. So one day I decided to wage war on it. I took the hardscape out and left it in the summer sun to kill the lion's share of the BBA. The rest I killed with a product called APT Fix, which is apparently similar to Excel but more effective. I'm looking for an alternative however because it's fairly expensive and the battle with BBA continues. Never had a problem with it harming the livestock. My other measure to combat BBA was to crank the CO2 to crazy levels and run it on a separate line for added stability. I did this recently, so we'll see how it turns out.
The hardscape consists of some slate rock, which I've found is a cheap way to make large, fairly natural looking formations. A real aquascaper could do a better job of this, but I've found that if you arrange all the slate at the same angle, it looks like a single large formation rather than individual rocks. A very cheap way to get big rock formations.
I also have some really wonderful wood called Ohko wood that I bought online from SRAquaristik. My tank might not show it off well, but it's really beautiful wood, full of gnarls and holes and little hiding spots. That was another reason why I nuked the BBA. It entirely obscured the wood. My only complaint with the wood is that it comes as pretty solid hunks which don't allow much flow. I came to realize why most aquascapes use branch-like pieces of wood. But with a full 8 feet of spray-bar in the tank and 10x turnover, I'm hoping that the tank's flow is still adequate.
The substrate is Safe-T-Sorb, a calcined clay product designed to clean up oil spills. I really think it's a great low-cost substrate that looks absolutely great, as good as any real substrate, although it has some significant downsides. It's a little lighter than is ideal for a planted tank, but it easily holds down the plants that I use. It's also dirty, requires washing, and clouds the tank when you first put it in. It also never fully becomes clean because it breaks down slightly as you shift it around, but it does fully settle and allow the water to become clear. As I've said, I have a problem with particles in the water, but I don't think it is due to the substrate because the particles appear to be bits of food, waste, and vegetation rather than substrate particles.
I would like to mention one thing I've learned about aquascaping. I used to agonize over putting as little gear in my tank as possible until I realized how well it can be hidden by tall plants and hardscape. The pump in my tank and the filter intake are totally hidden by plants. Only the UG tubes are visible. The back spray bar is also visible, but only at low viewing angles. Glass lily pipes look great, but feel that its better to use black plastic and put stuff where it won't be seen.
Speaking of which, the back of the tank is covered by a cheap stained-glass type plastic film plus some freezer paper to give it a frosted look. This hides the massive corrugated FX tubes surprisingly well, and I feel that it allows the tank to look a part of the surrounding room better than a black background. It also allows the BBA on the back glass to really shine in the spotlight.
Fertilizer
I am doing an adapted EI regime consisting of P, K and micros, alternating between macros and micros 6x a week. I tested for nitrates and found that they were always more than plentiful so I eliminated KNO3 dosing. One day, I'll buy a phosphate test kit and probably eliminate that too. It took a while on those fertilizer calculators to figure out how to substitute KNO3 with K2SO4. One day I will tell my grandchildren not to confuse the mass of P with the mass of PO4.
I have reminders set up on my phone and add the dry fertilizers with little spoons. I've thought of getting a doser but I'm afraid that would tip me over into becoming a full-blown saltwater guy.
I got tired of the ugly fertilizer bags so I use little tea tins to hold the fertilizer. They're supposed to be food safe but I got them off Amazon so who knows. Also, knowing nothing of chemistry, I wondered if they would somehow react with the tins. So far they have not burst into flames.
I also add ferrous iron as iron supposedly goes out of solution very quickly in aquarium water. Another one of those things where I'm not entirely sure if it is accomplishing anything.
Water Changes
I do water changes through a potable water garden hose that drains into my bathtub and then connects to my sink for the refill. I start the siphon via a old, cranky unit that weighs about 185 pounds and is a pain to maintain but has a lot of sentimental value for me. The hose connects to my sink via a garden hose quick-connect, which I highly recommend, although it takes a bit of technique to attach. On the other end of the hose is a Python hook with a DIY water-breaker made from an AquaClear intake and half a water filter cartridge, bound together by one of my beloved removable zip ties.
For any beginners reading this, I cannot stress this enough: find a way to do water changes via hose rather than buckets. For tank large enough to require more than one bucket, it saves tons of time and labor.
For anyone else reading this, I found a great solution for temporarily holding hoses: broom holders. Very cheap and perfect for securely holding a hose while allowing for quick attachment and release. I cleaned my tub for the pic below. Yes, that is after cleaning.
Livestock
There is a reason this section comes close to last. I do my best to provide a good environment for my fish, but I'm actually not a big fish guy. The livestock consists of some red cherry shrimp and a growing horde of what I've been calling guppies but are maybe endlers? Or guppy endlers? Maybe somebody can clear this up for me. Again, I'm no aquarium expert -- I'm really just a guy who likes to tinker with things and aquariums give me an excuse to do so. I started with 6 beautiful guppies who sadly committed mass suicide by jumping out of the tank. It was new, and I'm afraid the water quality wasn't good enough. A dark day. Happily, one of them gave birth before leaving this world, and the tank is occupied by its fry and successive generations. Only one of them has committed suicide so far. Strangely, none of them look like their parents but that's OK. One day, I'd like to get a breed of red guppies where even the females are red so as to contrast with the green plants.
Power
I power everything on a Kasa smart power strip that I think works quite well. It's basically like a set of smart plugs but its best feature is that the outlets are spaced far apart and arranged sideways so you can plug multiple power bricks into it. I used to buy 6-plug strips and realize I could only plug like 3 things into them. All of that is plugged into a GFCI adapter because my home outlets don't have GFCI.
The End
So that's the tank as it stands. Not being a dyed-in-the-wool aquarium guy, I would love to know if I am making any terrible mistakes or general faux pas. Hopefully, the idiosyncratic (remove the "syncra" if you like) solutions that I've come up with will be of some use to you as you ponder your own solutions to various aquaristic dilemmas. In truth, I still feel like my discovery of broom holders to hold hoses is something akin Watson and Crick discovering the structure of DNA. To anyone who has read this far, I salute your endurance and will keep my comments about your sanity to myself. Thanks for reading, and I will update if there are any newsworthy developments!