• You are viewing the forum as a Guest, please login (you can use your Facebook, Twitter, Google or Microsoft account to login) or register using this link: Log in or Sign Up

jbl proflora direct atomizer users

It all fills with water when no CO2 is on, about 50PSI for my input rate.
I found out that the bottom chamber has a design fault and needs to be fitted with an extra seal to make a tight connection.If you do this.then this inline diffuser will produce tiny bubbles like a CHAMP .the cheramic champer must NOT fill with water when co2 is off!

Sendt fra min EVA-L09 med Tapatalk

can you elaborate? which seal do you need extra, do you have any pics?
 
I'm currently testing the Proflora 12/16 and placed the extra sealing ring. It diffuses the CO2 very well.
But when I turn the CO2 off over night, the CO2 tube underneath the Proflora fills up with water.
When I turn on the CO2 again it pushes out the water and starts diffusing the CO2 again..
I use an extra check valve so it's not very harmful I think? Should I adjust something?

(on the JBL website they suggest soaking the ceramic in water for 24h first.. I didn't do that but it's running for two days now..)
(I filled up the bubble counter with water in the beginning but now it's completely filled, is this normal?)


!! I just realize that my Proflora is at the same height as my CO2 output.. should I place it 20cm higher?

IMG_3635.JPG
 
I’ve had one of these JBL pro flora for a while now and while it did a decent job of enfusing the water with co2, it did seem like there were lots of big bubbles coming out of the filter outlet. I’d see them popping at the surface so I knew there was gas being wasted. I found mine was also leaking so bought 140 washers from Toolstation for £2 and popped one in to take up the slack between the ceramic defuser. The result is much, much better as I’m now getting tiny bubbles and no popping at the surface! I’ll need to keep an eye on the drop as I’m sure I’ve just improved efficiency by a good amount.

Not to mention I also cleaned my filter and pipe work and while there found the impeller was filthy. I cleaned it and then realised the open/close valve was faulty too so I used a screwdriver to open up the filter inlet fully and reinstalled. The result was about a 50% increase in flow! I think my SunSun canister has also been like this and I’ve just accepted it was a little weak. So glad I spotted it as I now have so much flow that I’ve removed my wave maker!

Quite a productive cleaning session
 
I'm currently testing the Proflora 12/16 and placed the extra sealing ring. It diffuses the CO2 very well.
But when I turn the CO2 off over night, the CO2 tube underneath the Proflora fills up with water.
When I turn on the CO2 again it pushes out the water and starts diffusing the CO2 again..
I use an extra check valve so it's not very harmful I think? Should I adjust something?

(on the JBL website they suggest soaking the ceramic in water for 24h first.. I didn't do that but it's running for two days now..)
(I filled up the bubble counter with water in the beginning but now it's completely filled, is this normal?)


!! I just realize that my Proflora is at the same height as my CO2 output.. should I place it 20cm higher?

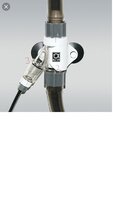
View attachment 114609

The water in the pipe is the non return valve not working as it should, but you have another one fitted inline (as Zozo advises) so not an issue. Might be worth cleaning valve next cleaning but may just be faulty from new.

Get big bubbles from mine too, but running at 50psi and a very high injection rate. Having reactors sort of sorts the issue as no go to the tank.
I am planning doing reactor mods to my APS EF2 reactors which should help but only at the alpha planning stage ATM
The intail plan is a self contained Venturi system with the APS filter with a cone and hopefully a water spinning vortex. First job is to place a window in the APS EF2 so I can see what's happening to the bubbles. Got a spare APS EF2 ready for moding already.
 
Cleaning the membrane with a hose brush does miracles in making the mist finer..... And you could also bleach it.
Soaked mine in Citric acid then bleach and bottle brushed it still big bubbles, put it down to the high psi and injection rate I use.
 
How old is it? Maybe time for new one?

Thought they was getting a bit old so with using two JBL pro directs on one tank, I bought a new direct membrane soaked it fitted to one, then cleaned/soaked bleach etc the old membrane before changing the second one. No difference in bubble size.

Old vid of BPS rate

 
I found out that the bottom chamber has a design fault and needs to be fitted with an extra seal to make a tight connection.If you do this.then this inline diffuser will produce tiny bubbles like a CHAMP .the cheramic champer must NOT fill with water when co2 is off!

Sendt fra min EVA-L09 med Tapatalk

Hii, care to share where did u add the additional seal? I just bought the jbl direct and encountered its diffusing bigger bubbles compared to UP inline diffuser.

I saw other forums mentioned jbl diffuser cant produce the same mist like bubbles size like UP
 
I have attached the pic. Can advise add additional o ring to which position? 1 , 2 or 3?
 

Attachments

  • jbl.jpg
    jbl.jpg
    70.1 KB · Views: 631
I retro fitted additional o rings to 1 and 2. Essentially it doesn’t matter as these just compress the ceramic diffuser in the chamber so the gas can’t just take the easiest route which in the case of a standard off the shelf unit would be passing by the existing o rings at these positions.

Mine is working great now and produces a misty look similar to that of using an in tank diffuser. Without the o rings added, large bubbles of gas are emitted so this proves most units are still shipping as faulty which isn’t really German quality imo.


Sent from my iPhone using Tapatalk

Thanks for your reply Franks. Will try add the o rings to 1 and 2 position to see whether can i get the misty look.
 
I retro fitted additional o rings to 1 and 2. Essentially it doesn’t matter as these just compress the ceramic diffuser in the chamber so the gas can’t just take the easiest route which in the case of a standard off the shelf unit would be passing by the existing o rings at these positions.

Mine is working great now and produces a misty look similar to that of using an in tank diffuser. Without the o rings added, large bubbles of gas are emitted so this proves most units are still shipping as faulty which isn’t really German quality imo.


Sent from my iPhone using Tapatalk
Hi franks,

Just to confirm about retro fitting additional o ring to position 1 and 2 which u mentioned, are you refering to the seals for the ceramic diaphragm? How about the seal for housing lid? Did you add additional seal to it?

I realised that the o ring jbl using is flat liked washer type. Not those typical rounded o ring.
 
I manage to get some genetic flat rubber washer. Cut it to similar size and slice it coz its too thick.

Pop it in between the ceramic diffuser and test run it. Hmm, nw i can see micro bubbles being diffused out from my outlet. Guess its work. Bubbles are very tiny but still cant achieve those misty liked bubbles like from the UP inline diffuser. =)

Changing the bubble size/seal will affect the working pressure and the amount of CO2 used and uptake by the water.
Doing a new pH profile or at least keep a close eye on the DC colour change to see if any change in the [CO2] would be wise ;) just to confirm your your tank is safe for livestock and [CO2] is enough.
 
Oh yeah certainly worth mentioning. You’ve effectively fixed an internal gas leak and made the diffuser more efficient so treat this modification as a new Co2 install and monitor hourly until dialled in.


Sent from my iPhone using Tapatalk
 
Back
Top